What We Need
Output Specifications from your device to quote and onboard your spare.
Why This Matters
Learn what happens with the outputs retrieved and why we need the information from these commands at PivIT’s Sparing Integrity Program.
Procedure
Step 1.
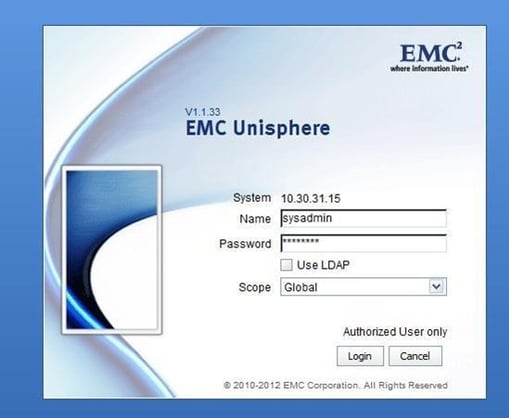
Log into EMC Unisphere by browsing to the ip address of the Control Station for “Unified” VNX. Browse to the ip address of the SPA for “Block Only” VNX. (VNX5100 is block only)
Default login: sysadmin/sysadmin
Step 2:
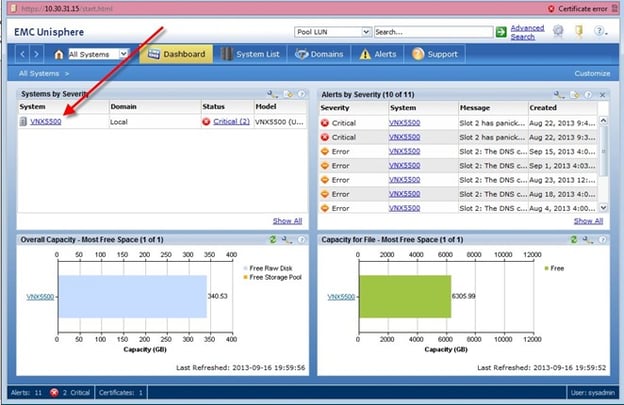
Select the VNX system you want to collect from.
Step 3.
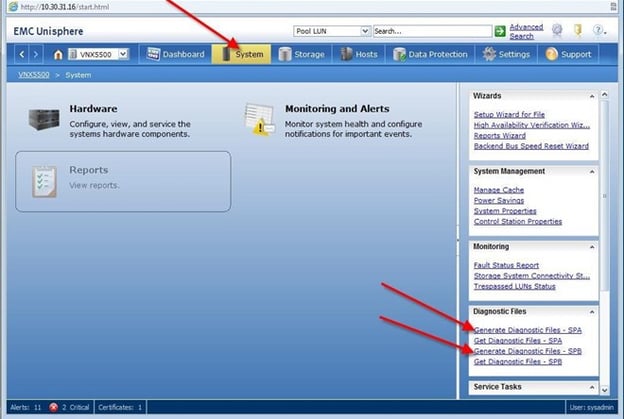
Click on “System” , Then “Generate Diagnostic Files – SPA and SPB”.
Step 4.
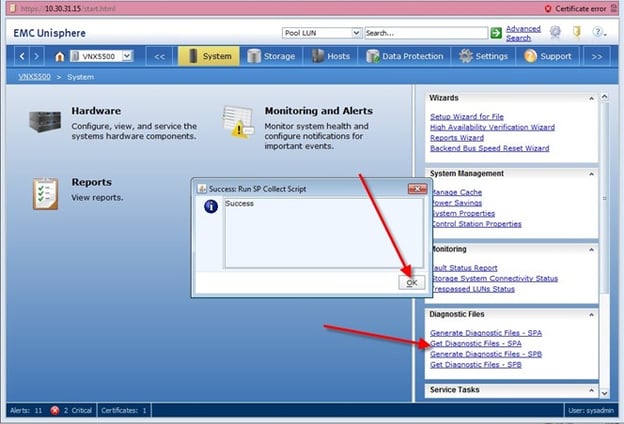
Select “Yes” to run the script for each SPA and SPB. This will start the creation of the “data.zip” files to be downloaded.

Step 5.
Acknowledge the running of the script with “ok”. Do this for both SPA and SPB. To download data.zip files click on “Get Diagnostic Files – SPA”.
Step 6.
This will open “File Transfer Manager”. Maximize the SPA – File Transfer Manager window. Maximize SPA-File Transfer Manager window.

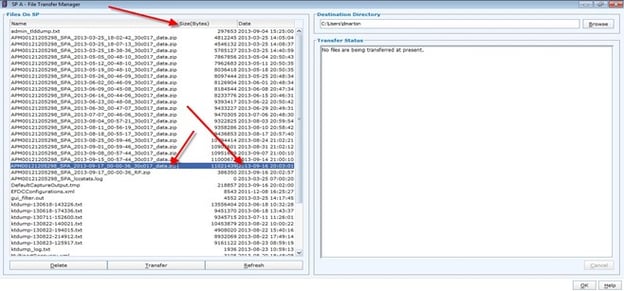
Step 7.
Slide “ Name” column to the right so you can see full filename extension. Look for the newest “data.zip” file and highlight it. Click “Refresh” a couple of times to see if the file size changes. If it does not then it is finished creating and is ready for transfer.
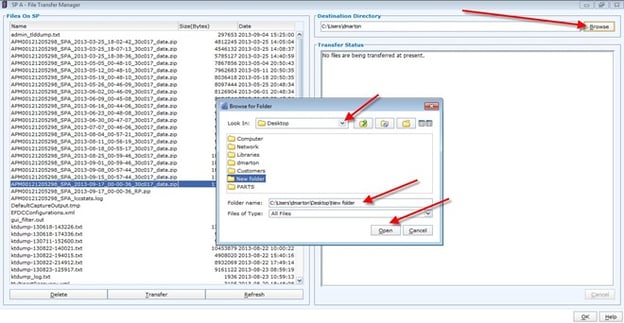
Step 8.
Select “Browse” and point to a known location on workstation the for file to upload to.
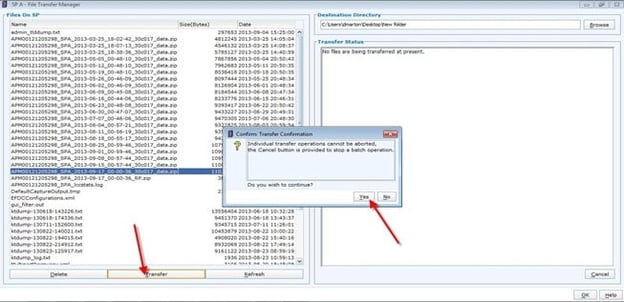
Step 9.
Select “Transfer” then “Yes” to upload the data.zip file to the selected destination. Do this again for SPB by redoing steps 5-9.
Step 10.
Once the files are now downloaded to the workstation then please upload to the secure File Drop page using the below link:
https://onecall.pivitglobal.com/file-upload/quote
Please fill in as much information on this page to identify where the files are coming from, if they need to be reviewed ASAP or NBD, and any notes that may be pertinent. You may drag and drop the Diagnostic Files or use the “Add Files” button on this page then click “Send” to send the files to PivIT Global. A confirmation email will be sent to OneCall Support letting them know the files are now available for review.
This concludes this procedure.