"Big data" is a buzzword you may have encountered before in recent years. It is a term that describes large, hard-to-manage volumes of data (structured and unstructured) that can be analyzed for insights that improve business decisions.
The rapid progress of bandwidth-intensive applications and services (such as those dealing with large volumes of data across networks) is constantly increasing the deployment of higher-speed switched Ethernet networks in enterprises.
Real-time communications such as VoIP calls, video conferencing, or interactive messaging do not just demand scalable bandwidth within the core of the networks for everyday corporate tasks but also at the internet edge for uninterrupted public communications.
The only way to satisfy these new demands is by providing sufficient bandwidth within the networks, which can be achieved using two different approaches. The first approach is to increase the speed of the links, but this solution cannot scale indefinitely.
It can be done only to a certain point until the fastest possible port is no longer fast enough to satisfy the bandwidth requirements. The second approach is by providing additional physical links between the switches. However, the spanning tree protocol (STP) blocks all except one link to avoid any switched loops in the network. Therefore, the only reasonable solution is to use EtherChannel.
This article will provide an overview of the EtherChannel technology, its benefits, the configuration options you can use, and how to implement one.
Ready to browse all switches?

EtherChannel Overview
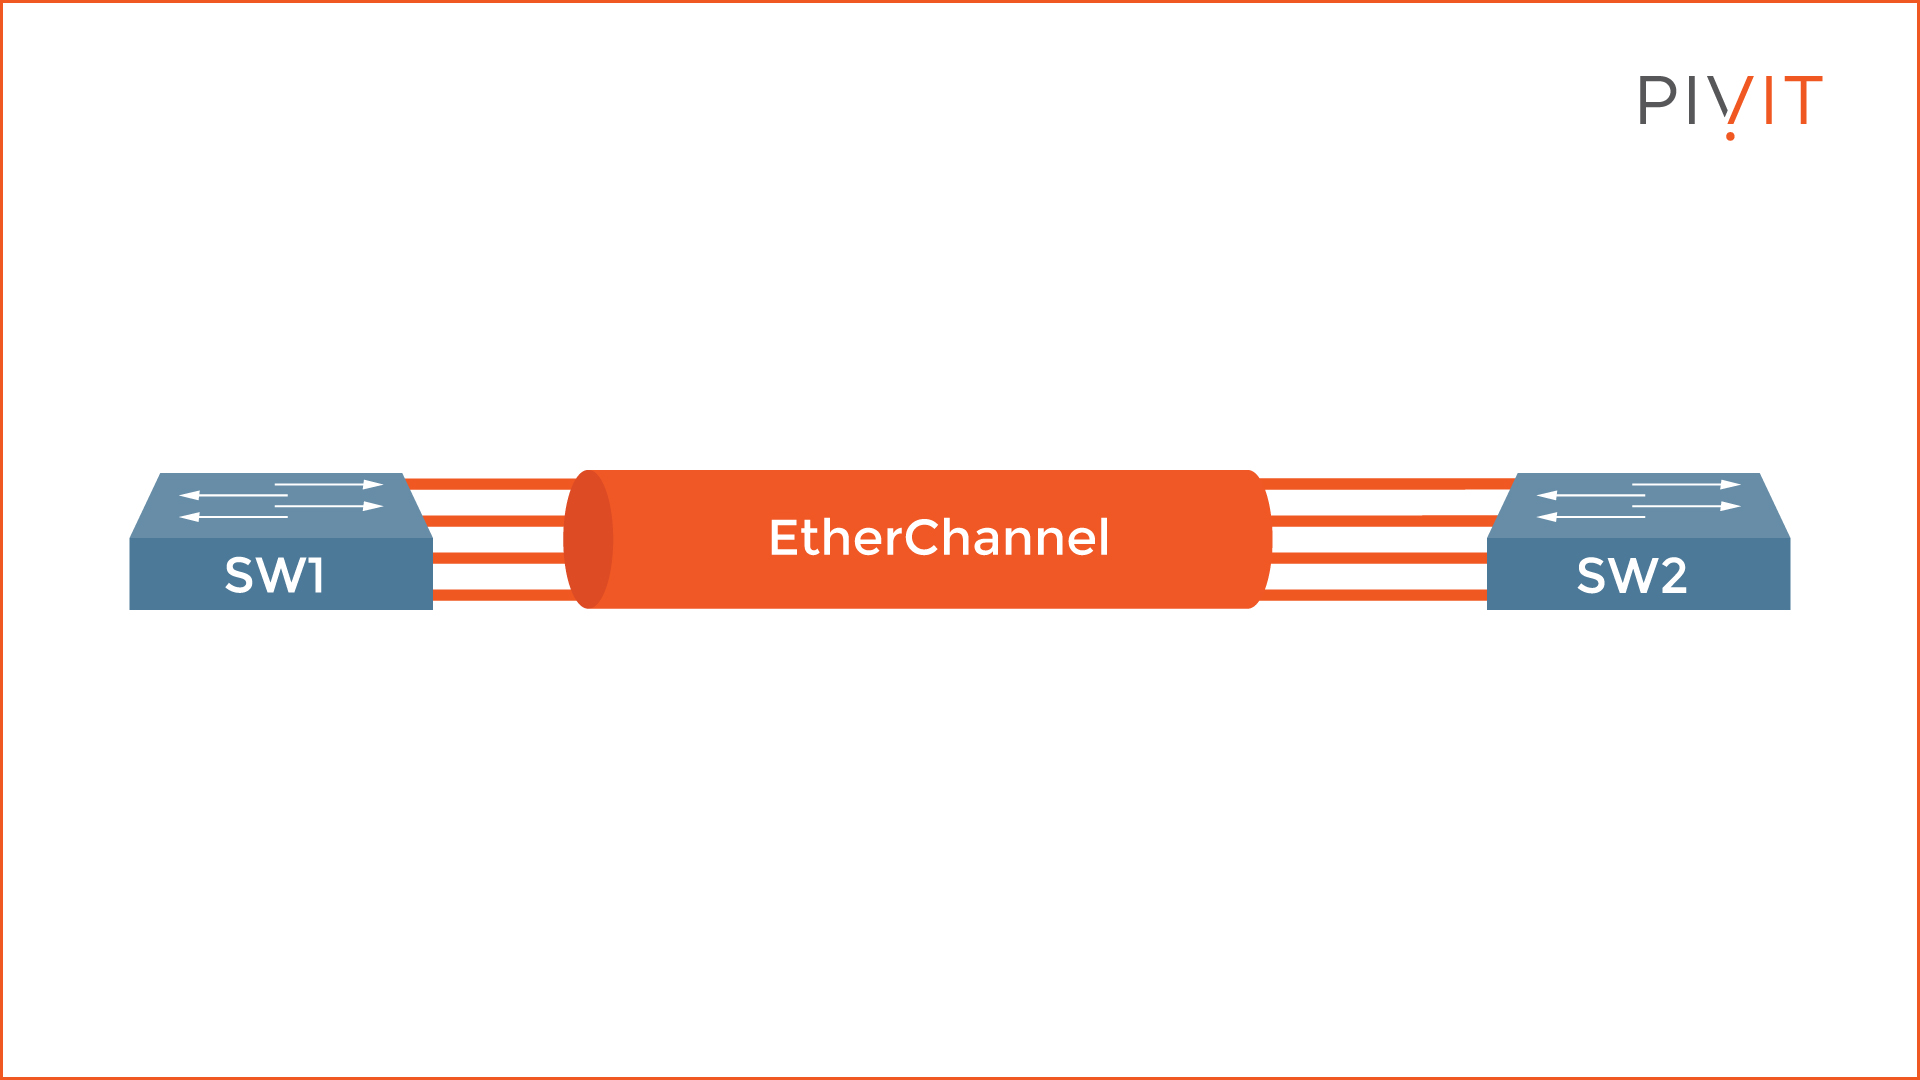
EtherChannel is a technology that enables link aggregation. It bundles several physical ports into one logical interface, allowing packets to be sent over those interfaces as if over a single interface. This approach offers more bandwidth, redundancy, and load balancing simultaneously.
Cisco originally developed the EtherChannel technology to provide more bandwidth between the switches in the core of the networks. However, after many improvements, you can now implement it on other devices, such as routers, firewalls, or endpoints.
How does the EtherChannel technology work? EtherChannel allows you to bundle multiple physical interfaces into a channel group (this is the configuration command) to create a single logical interface called "port channel."
This logical interface aggregates the bandwidth of the several physical interfaces bundled together, and you configure it the same way as any other physical port on the device. However, once becoming part of one port channel, the physical interface can participate in another one.
Also, let's keep in mind that EtherChannel always creates logical links that connect only two devices. As a result, you cannot send traffic to two or more different devices through the same EtherChannel logical link, but only to a directly connected one.
View our Cisco switch comparison guides for further insight into different models:
- Comparing the Cisco 3560, 3850, and 9300 Switches
- Head-To-Head With the Cisco Catalyst 4500 vs. 9400 Chassis Switches
- Deep Dive Comparison: Cisco's Catalyst 6500 & 6800 Switches
Conditions for EtherChannel
To create an EtherChannel, you cannot simply combine any interfaces with any settings applied, but several conditions must be met first. When configuring one, you can group two to eight physical interfaces, while some more advanced switches support up to sixteen.
However, these physical interfaces must also be compatible and share the same configuration settings. Otherwise, they will not bundle into a port channel.
The requirements for creating an EtherChannel include the same:
- Port type
- Speed and duplex
- Interface mode
- Switchport mode
- VLAN information
This means you cannot mix port types within the port channel interface, such as FastEthernet and GigabitEthernet interfaces, while parameters such as speed and bandwidth must be the same.
On devices that support Layer 3 functionalities, you cannot aggregate switched and routed ports, so you use only Layer 2 or Layer 3 interfaces simultaneously for a single EtherChannel.
Furthermore, all individual interfaces must be configured to operate as access ports or trunks. If they are in access mode, they must belong to the same VLAN, but if they are trunks, they must allow the same range of VLANs on the trunk links, and the native VLAN must be the same.
Although additional links provide resiliency, most of them get blocked because of STP, and the available bandwidth between the connecting devices is not increased. However, the port channel is considered a single interface by STP, so it no longer sees the bundled interfaces as separate links. Accordingly, all physical ports stay active and operate at the same time.
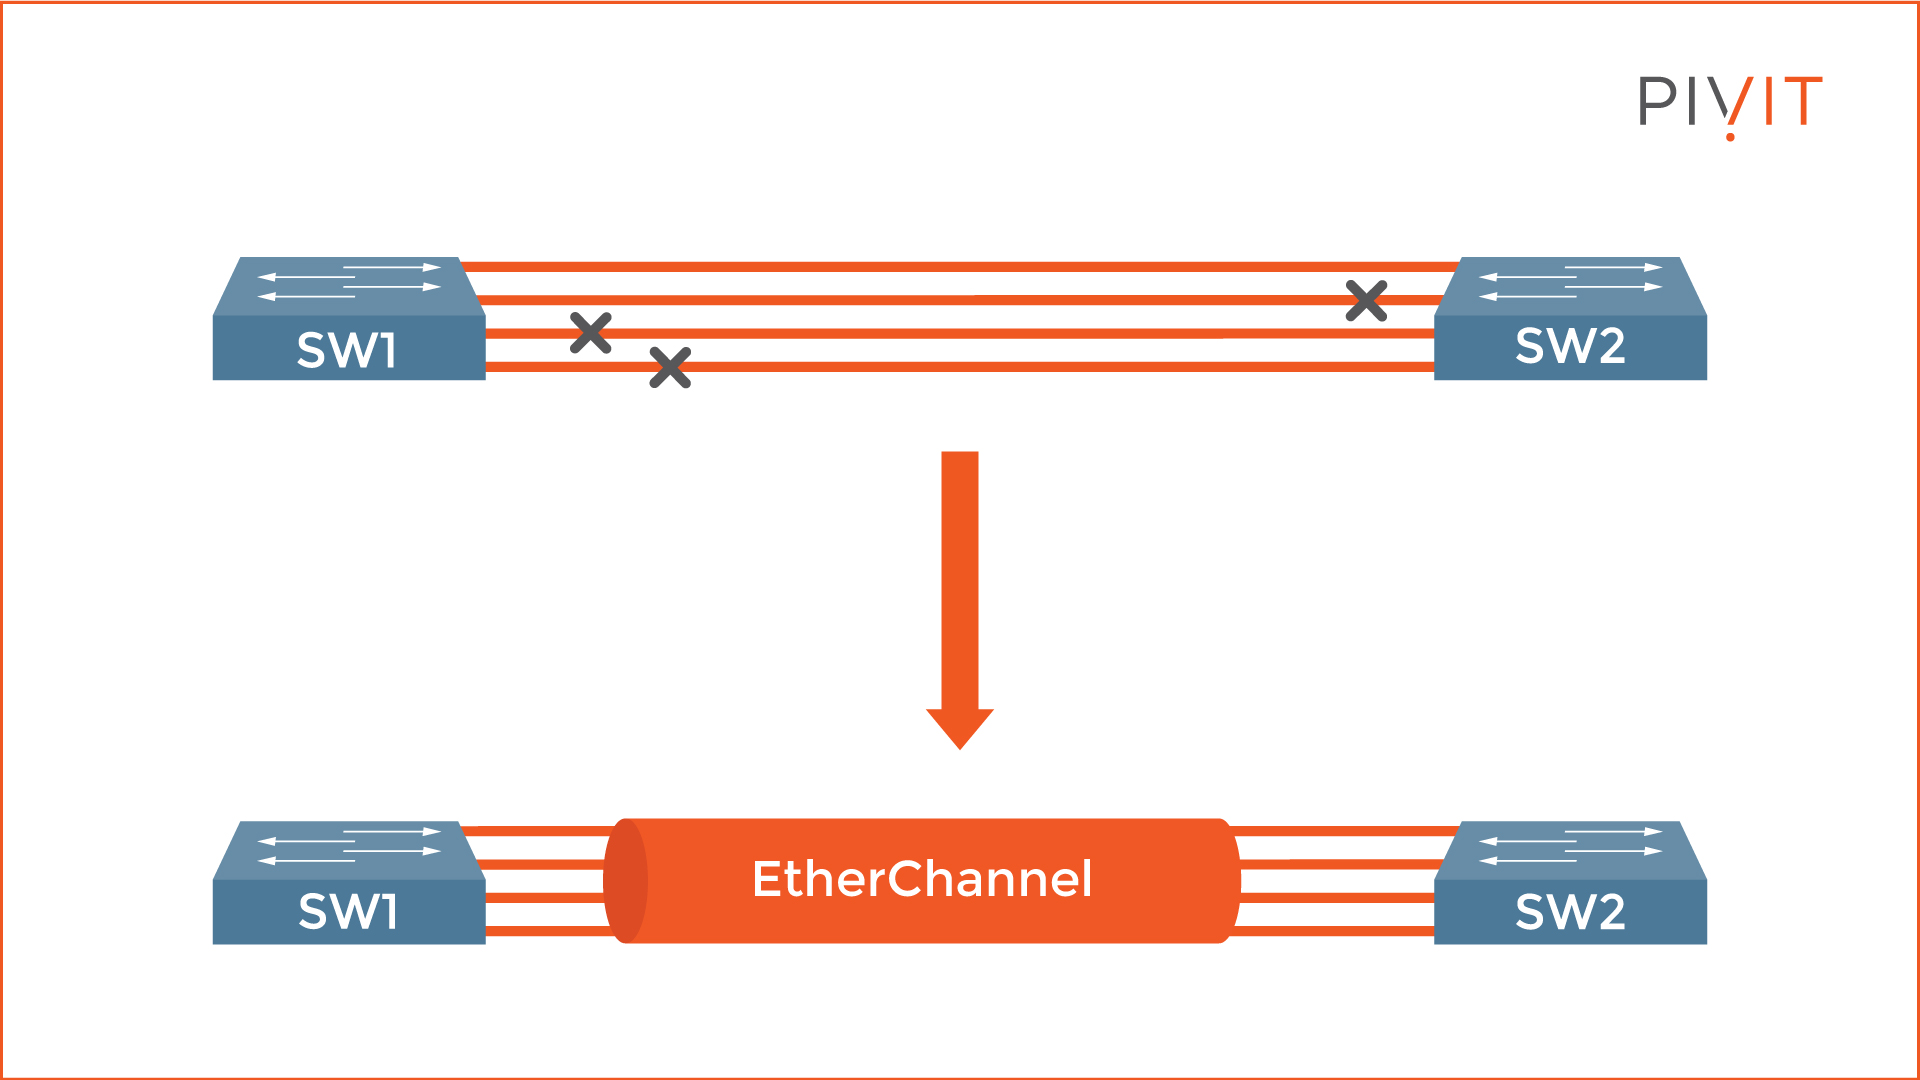
As you can see from the image above, when three additional links are added between the switches, STP blocks all of them to avoid loops. However, after binding them into a port channel, they all continue operating under the same logical interface since STP considers them a single logical interface.
EtherChannel Configuration Options
To configure EtherChannel, you have two options: manually configure it on both devices or use a protocol that automatically creates one.
Two protocols can be used for the EtherChannel deployment process, the Cisco proprietary Port Aggregation Protocol (PAgP) and the standard Link Aggregation Control Protocol (LACP). If you are wondering which one is better, then neither is!
They are equally good because they perform the same actions, and the only difference is the terms used in the configuration process, and that one is a Cisco proprietary while the other is a standard protocol.
Stop right there! Are lead times slowing you down and preventing you from getting the hardware or services you require for your data center? Send PivIT a request or connect with our Team in real-time using our chat feature.
If you want to use manual configuration, you must enable the EtherChannel functionality on each interface that should be included in the port channel by using the "On" mode. This way, the interfaces do not negotiate with each other by exchanging control packets but immediately become part of the logical port channel interface.
On the other hand, when you use PAgP or LACP, you must define the modes that interfaces will use. One mode defines the initiator of the establishment phase, while the other is passively waiting for the other side to start the process.
The active mode in PAgP is configured as "Desirable" while in LACP as "Active." The passive mode in PAgP is configured as "Auto," while in LACP as "Passive." Even though different terms are used, they perform the same actions, and based on the terms used in the configuration, you define the protocol you want to use.
EtherChannel Types
Depending on the type of interface (mode) you want to use for the EtherChannel, two different types of EtherChannel can be configured, and they are:
- Layer 2 EtherChannel
- Layer 3 EtherChannel
.jpg?width=1920&name=3%20(1).jpg)
Although they provide the same features, some differences exist in the configuration process and the options supported. Layer 2 EtherChannels are used among Layer 2 access switches in the networks. In contrast, Layer 3 EtherChannels are used mainly among Layer 3 devices, such as Layer 3 switches or routers in the distribution or core of the network.
Additionally, they can be used as aggregated links between the enterprise router and the service provider's router.
Do you have older switches that are coming up on their end-of-sale date? Roll those right onto your OneCall maintenance strategy, where you get dedicated spares to protect your critical infrastructure.

EtherChannel Configuration Example
The configuration steps for an EtherChannel are quite simple. First, you must define the requirements and the goal you want to achieve and then apply the appropriate commands on your devices between which the logical interface will be deployed.
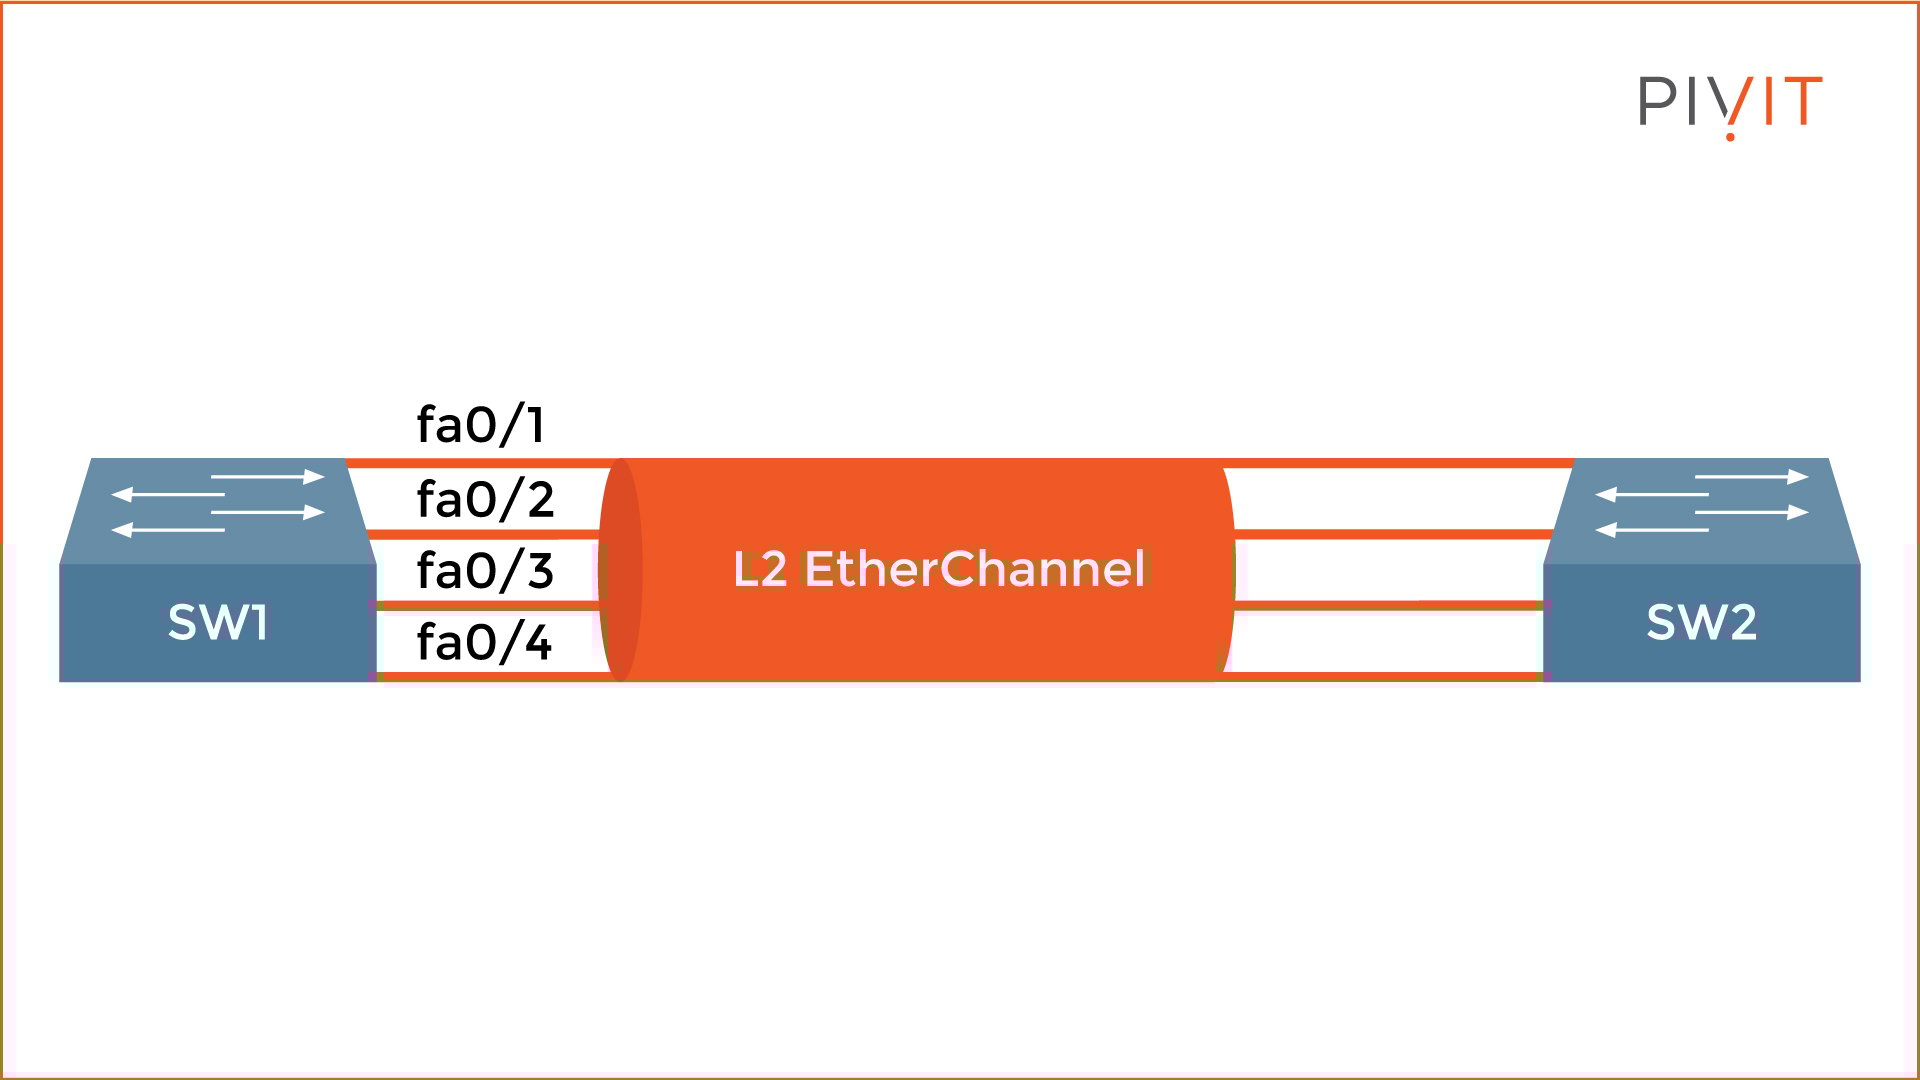
To better understand the whole concept, let's look at the image above, which will be used as an example. We have two switches, SW1 and SW2, and the goal is to implement a Layer 2 EtherChannel between them by bundling the four FastEthernet interfaces on each device.
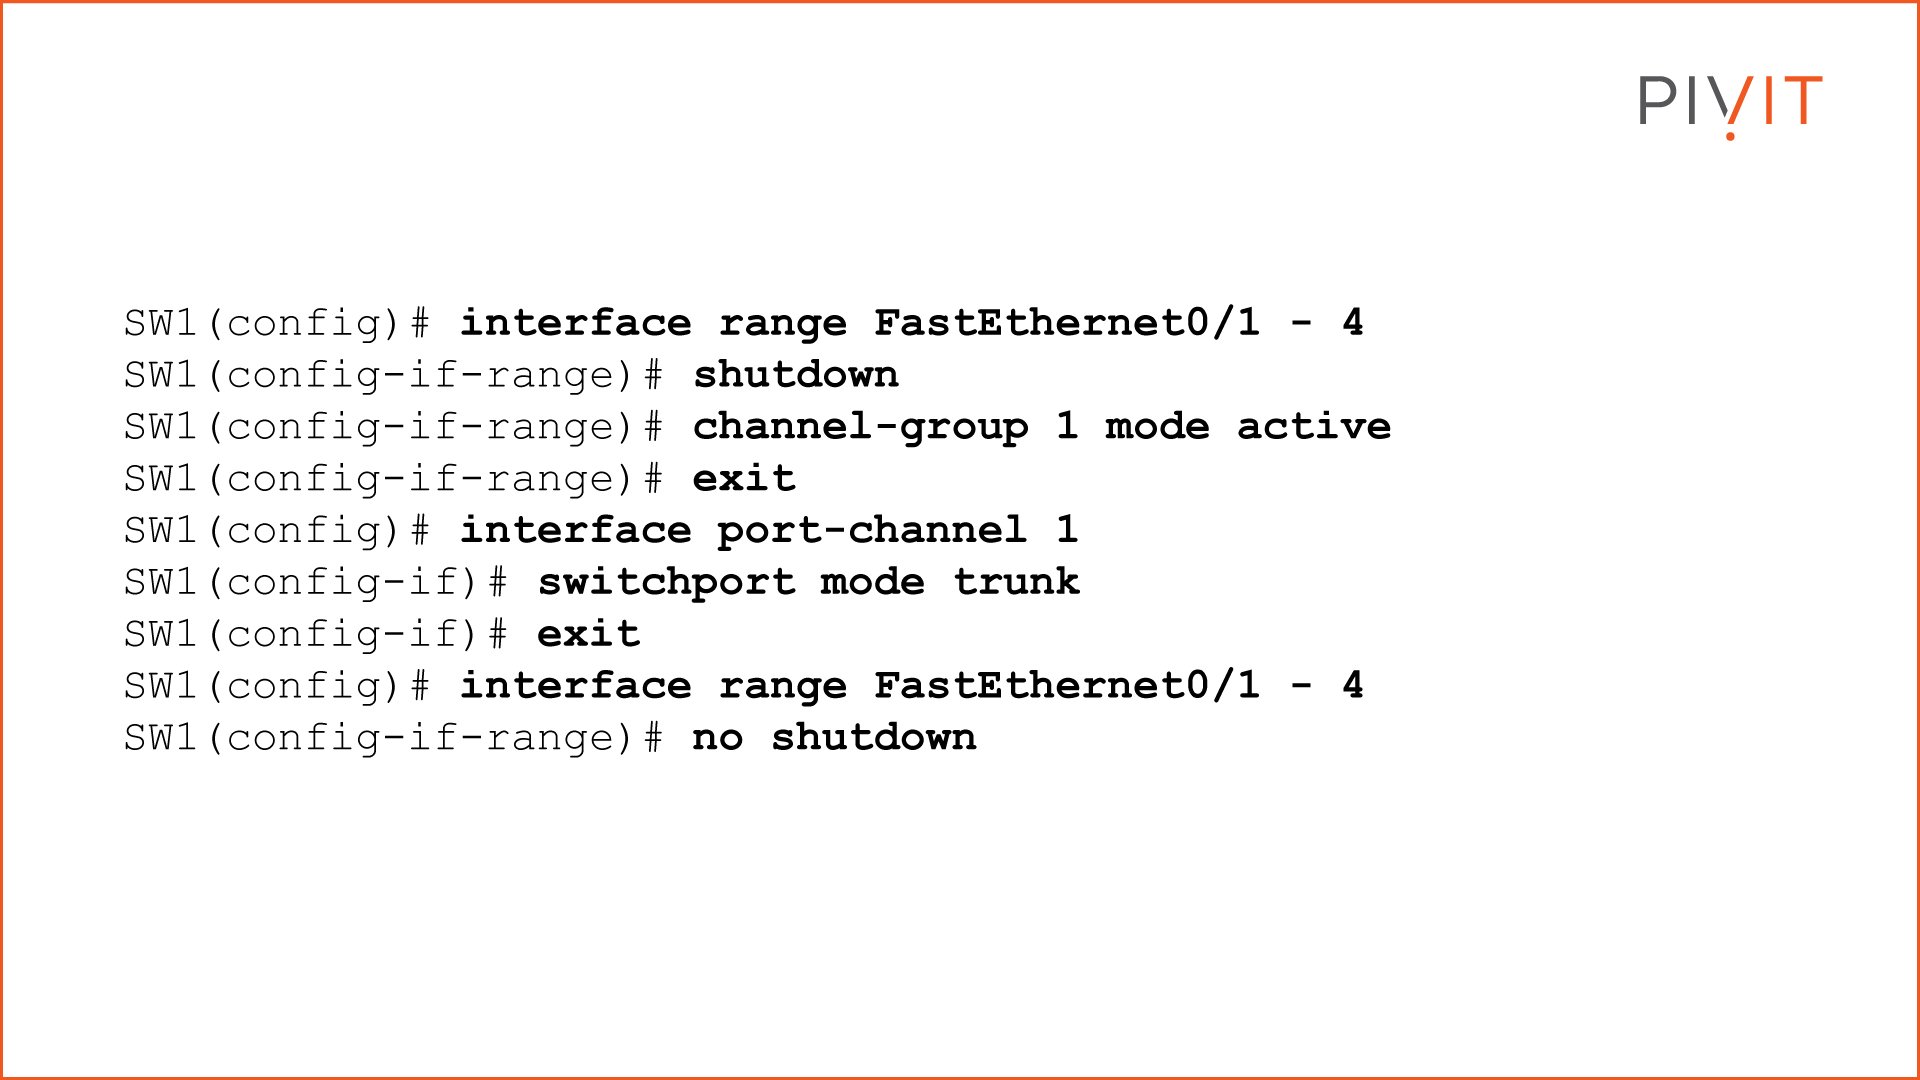
As you see from the commands above, you need to shut down all physical interfaces, so you do not experience any unexpected behavior during the EtherChannel implementation.
Then, you bundle them into a logical interface port channel 1 (it can be any number) by using the "channel-group" command and assign the desired mode (active mode in our case, which means LACP is used).
Once configured, you can access the port channel and configure it as any other physical interface on the switch (configured as a trunk in the example). Finally, you need to enable the physical interfaces so the EtherChannel can start functioning.
The configuration on SW2 would be identical to this one on SW1. However, if desired, you can use a different port channel ID (recommended to be the same) and a different mode (passive instead of active).
Suppose you want to create a Layer 3 EtherChannel. You must change the operational mode on the physical interfaces (assuming the switch is L3) from Layer 2 to Layer 3 by using the "no switchport" command.
After that, as a Layer 3 EtherChannel (you must use the same "no switchport" command for the logical interface), you can apply an IP address or any other Layer 3 parameter on the Layer 3 port channel.
Increase Bandwidth With EtherChannel Technology
Networking hardware is getting cheaper, and you can easily afford devices with faster interfaces to support more bandwidth within your enterprise network. However, implementing an EtherChannel is an optimal solution that provides more bandwidth, additional redundancy, and load balancing capabilities.
Hardware Options For You
We make it easy for you to find the switches that allow for the EtherChannel feature. Click below or reach out to share the project you are currently working on with us.