.jpg)
A Pew Research Center survey found that 54% of U.S. employees prefer working from home. Additionally, the current trends suggest that a hybrid or 100% remote work model will become a standard over the next few years. This model has meant that businesses have had to create remote connections into their network to allow employees to access specific applications/services or for administrators to configure new settings on a network device.
A properly installed and configured enterprise network does not require interventions very often. However, configuration changes or upgrades are needed from time to time. Although console access is the simplest and most secure way to connect to equipment, it is impossible unless you are physically close to the equipment.
Therefore, in most cases, a remote connection is established using Telnet or SSH to monitor, configure, and troubleshoot a network. However, these protocols are not made equal.
This article will provide an overview of Telnet and SSH, their differences, and how to configure a router to deploy SSH.
View some of our other popular articles:
- The Importance of Layer 3 Redundancy: Understanding HSRP – Pt. 1
- The Importance of Layer 3 Redundancy: Understanding HSRP – Pt. 2
- The Ultimate Comparison Guide - FHRP Shootout: HSRP vs. VRRP vs. GLBP
The Need for Remote Access
In a perfect world, a set-and-forget network would be ideal. However, a network can be viewed as a live entity, requiring updates and configuration changes to keep it running smoothly. When appropriate actions are needed on a device, network administrators must first connect to the device in question. However, most of the time, the device can be on a different floor, building, or even in a completely different city or country.
As a result, console access is not always possible. This is when remote solutions such as Telnet or SSH can be used. These network protocols allow connecting to any device on demand at any location when the remote device is configured to support remote access. However, a remote connection sometimes can lead to disastrous consequences when not properly used.
Telnet – A Zero-Protection Remote Access Solution
Telnet is probably the most famous remote access solution developed about 50 years ago. It uses a text-based interface to create a virtual terminal, allowing network administrators to access applications on other devices. It is supported and enabled by default by most vendors.
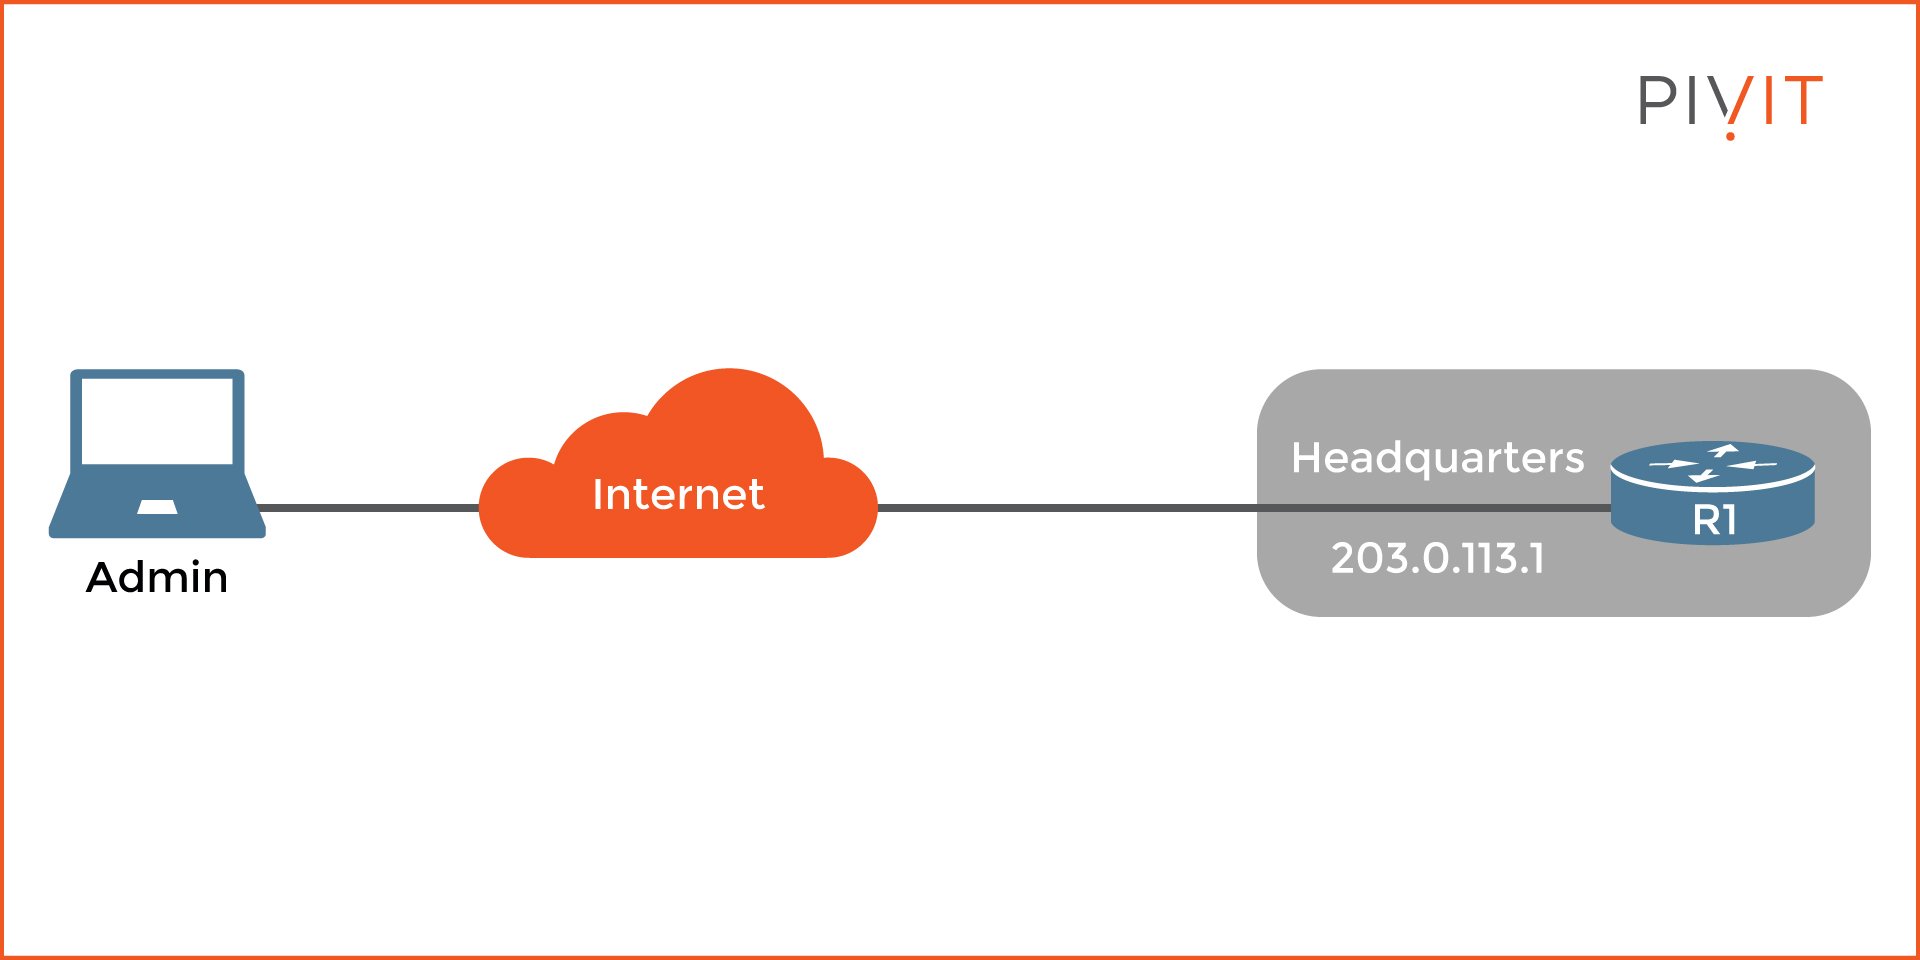
As you can see from the image above, when an administrator needs to access the headquarters router from home, the only command that needs to be entered is "Telnet 203.0.113.1" and then provide the requested credentials, either just a password or username and password.
However, as simple as it is to use this approach, Telnet should be avoided whenever possible. The main reason is that Telnet does not provide any protection when data is sent from one side to the other. Even the password that is provided for authentication is sent in clear text.
For that reason, enterprises usually have a policy to avoid Telnet for remote sessions over untrusted networks like the internet. They only use it internally in the local environment, even though that is usually forbidden. The only other time to use Telnet is if a device does not support SSH.
__________________
Explore your options here at PivIT. Click below to learn more about the router solutions we can bring to your network, whether it be the hardware itself, maintenance, or the field services you need to get online.

__________________
SSH – A Secure Remote Access Solution
To overcome the limitations of Telnet, SSH was developed in the 1990s and immediately took over as the preferred solution for remote access. Unlike Telnet, SSH is designed similarly to how VPNs work and provides privacy by using encryption, data integrity, and origin authentication using hashing functions.
Even though SSHv1 was a considerable improvement over Telnet, a vulnerability was found, and later on, SSHv2 was introduced. This version is more complex and supports better and more robust security algorithms to protect the data traffic.
Symmetric and Asymmetric Algorithms
In contrast to Telnet, where nothing is really used to provide security, SSH uses asymmetric and symmetric encryption. The most efficient and stronger symmetric encryption protects the data exchanged between the devices during the SSH session.
The same key is used for the encryption and decryption processes on both sides. However, that same symmetric key must be established first; for that purpose, we need asymmetric encryption.
The asymmetric encryption uses a set of two keys, one public and one private. The public key encrypts data that can only be decrypted with the private key. The public key can be freely shared, and although it can encrypt the private key, there is no method of deriving the private key from the public key.
How SSH Works
SSH uses the RSA asymmetric algorithm to securely exchange the symmetric key needed for protecting the data during the SSH session. Let's use the example image above. An SSH session needs to be established between Admin PC and R1. When Admin PC connects to R1, the router presents the client with its public key.
After that, they negotiate the security algorithms that will be used later on. Upon an agreement, the Admin PC creates a symmetric key (known as a session key). Admin PC then encrypts the symmetric key with the public key from R1 (previously received) and sends it to R1. Since R1 is the only device with the private key, it decrypts the encrypted content and extracts the same symmetric key that will be used during the SSH session for bulk protection.
__________________
As part of PivIT's EXTEND, we offer a secure, isolated, and remote environment to pre-configure your network, compute, and storage hardware prior to deployment to your locations around the world using our out-of-band (OOB) management platform. Find out more about how our Remote Staging Environment works.

__________________
Enabling SSH
By default, only Telnet is allowed on Cisco devices. Therefore for a device such as a switch, router, or firewall to support SSH sessions, SSH must be configured. Although the configuration steps are the same on different devices, we will focus on configuring SSH on a Cisco router.
A few requirements must be met before configuring SSH: change the device's default name and define a domain name. Those are needed to generate the key pair (the private and public keys). Once defined, a local account needs to be created that will be used for authentication. Then the asymmetric keys will be generated by using the RSA algorithm.
According to today's standards, it is recommended to use at least 2048 bits for the keys.
Once configured, the mode for the virtual lines needs to be defined that the local account (username and password) will use and that Telnet should not be allowed. SSHv2 can be defined as the only version allowed on R1. The commands below show the full SSH configuration on R1:
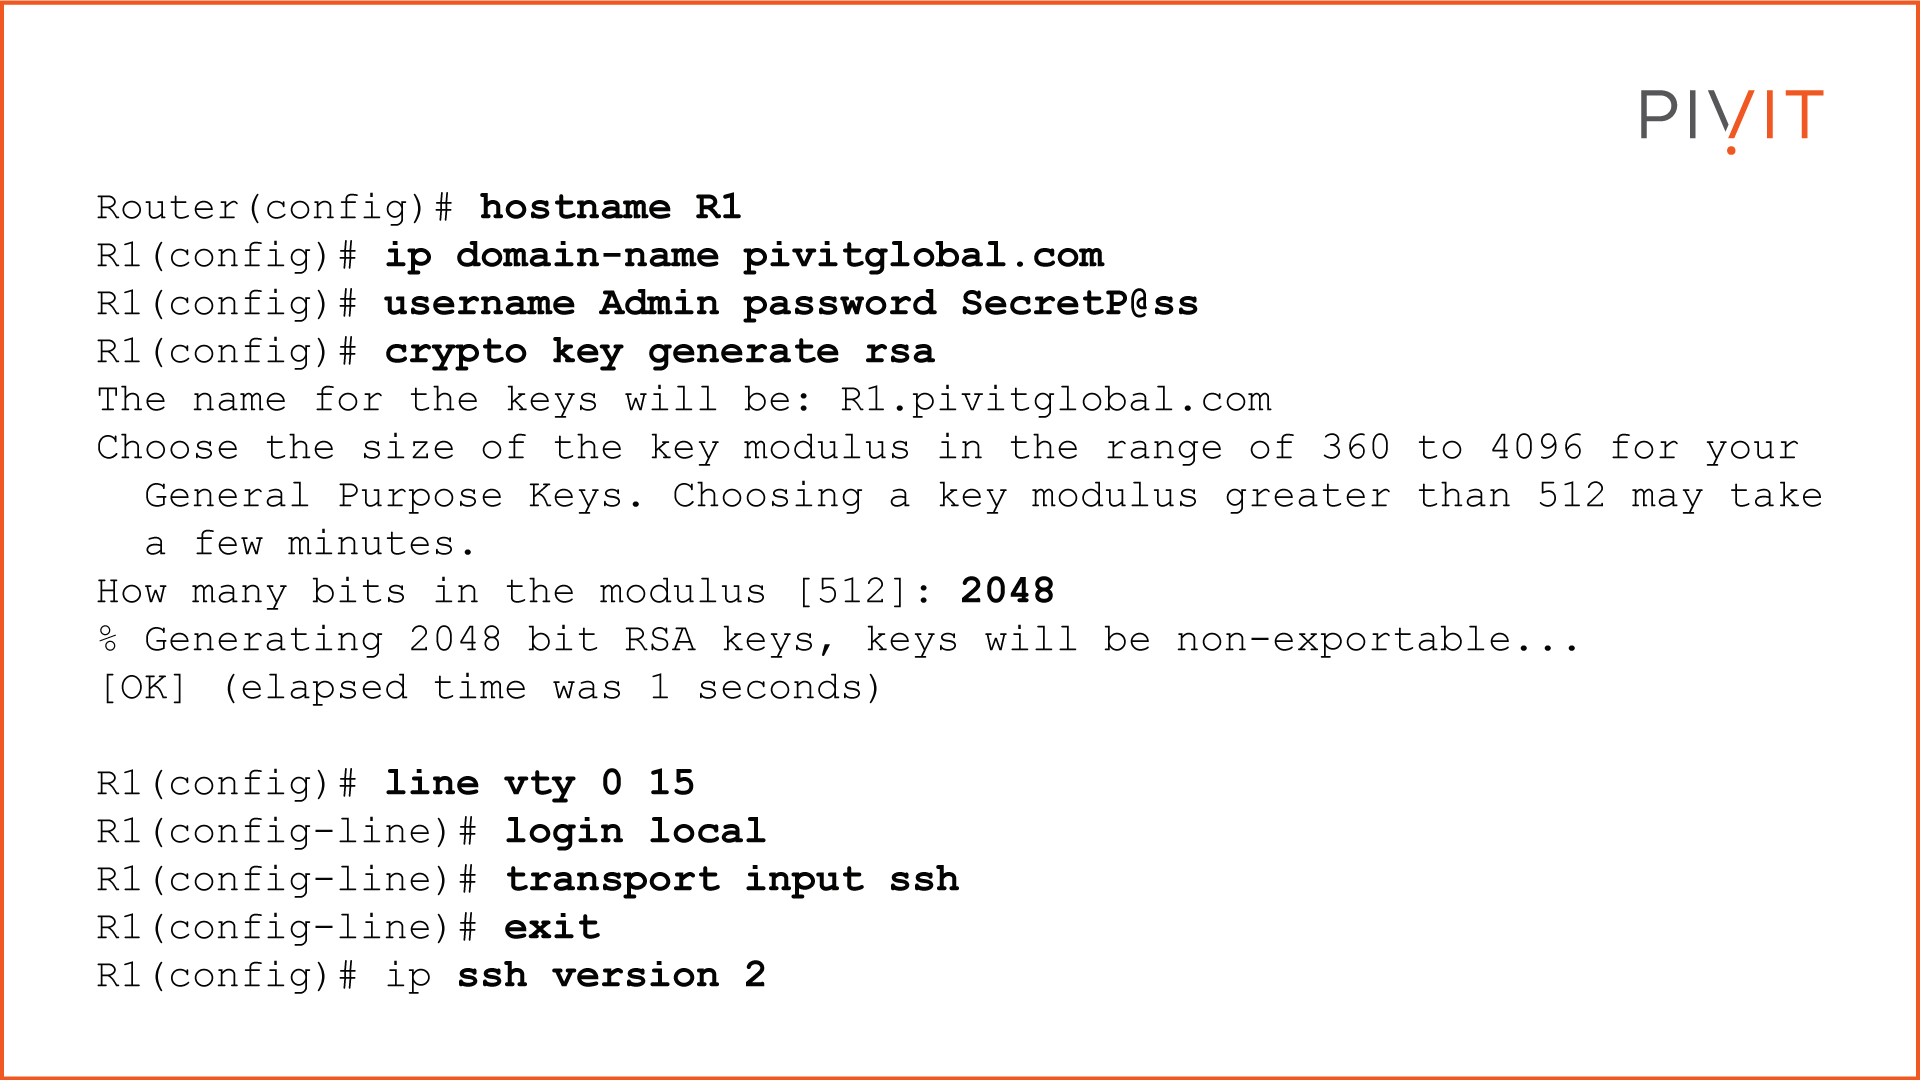
As you can see, enabling SSH only consists of a few commands. Once enabled, the device is ready for SSH sessions. All data exchanged between connected devices is secured and safe from external threats, such as stealing passwords or other important data.
__________________
Is your hardware maintenance plan coming to an end and due for renewal? Be sure to find out the three maintenance optimization strategies you can’t afford to miss in the video below:
__________________