Securing administrative access to network devices in an enterprise network is one of the most essential responsibilities that networking engineers have — sometimes the process can be challenging.
When a network device — such as a switch or a router — gets compromised, the entire network can quickly become compromised.
Unauthorized access also usually leads to more advanced attacks afterward. According to various studies and analyses, 70% of all attacks get initiated from inside networks.
An inappropriate security approach can heavily shake the enterprise’s reputation and cost hundreds of thousands or even millions of dollars in revenue which sometimes might lead to the point of no return.
The solution comes from a security approach where fundamental security recommendations are implemented on Cisco IOS devices.
In this article, we will provide details on the following:
- Securing access to privileged EXEC mode on a Cisco IOS device.
- Securing console access.
- Securing remote access.
- Configuring banner messages.
Not the configuration guide you are looking for today? View some of our others:
- The Ultimate Guide to DHCP Spoofing and Starvation Attacks
- Your Ultimate Inter-VLAN Routing Configuration Guide for Cisco
- Must-Have Port Security: Simple but Efficient Layer 2 Protection
Securing Access to Privileged EXEC Mode
The Cisco IOS operating system consists of several configuration modes that are hierarchically structured. The first two modes that you access when connecting to a switch or a router are the EXEC modes. The user EXEC mode is the one that you enter first by default. You have minimal privileges there.
However, you can access the privileged EXEC mode and enjoy administrative privileges from user EXEC mode. Since no authentication is used by default, users can access this mode and configure anything on the device. This can easily lead to a security breach, so you need to secure access to the privileged EXEC mode.
The simplest and most successful way is by implementing authentication. You can easily achieve this by configuring a password that the user must provide to access the privileged mode of the device. There are two different approaches that you can use to authenticate a user when providing a password.
The first option is to configure a simple (enable) password. This configuration is done in global configuration mode, and the password is shown in plaintext in the running configuration. The other option is to configure a secret password. When configured, this password is not shown in plaintext in the running configuration of the device, but only a hashed version of it.
The following commands configure simple and secret passwords on a Cisco IOS device:
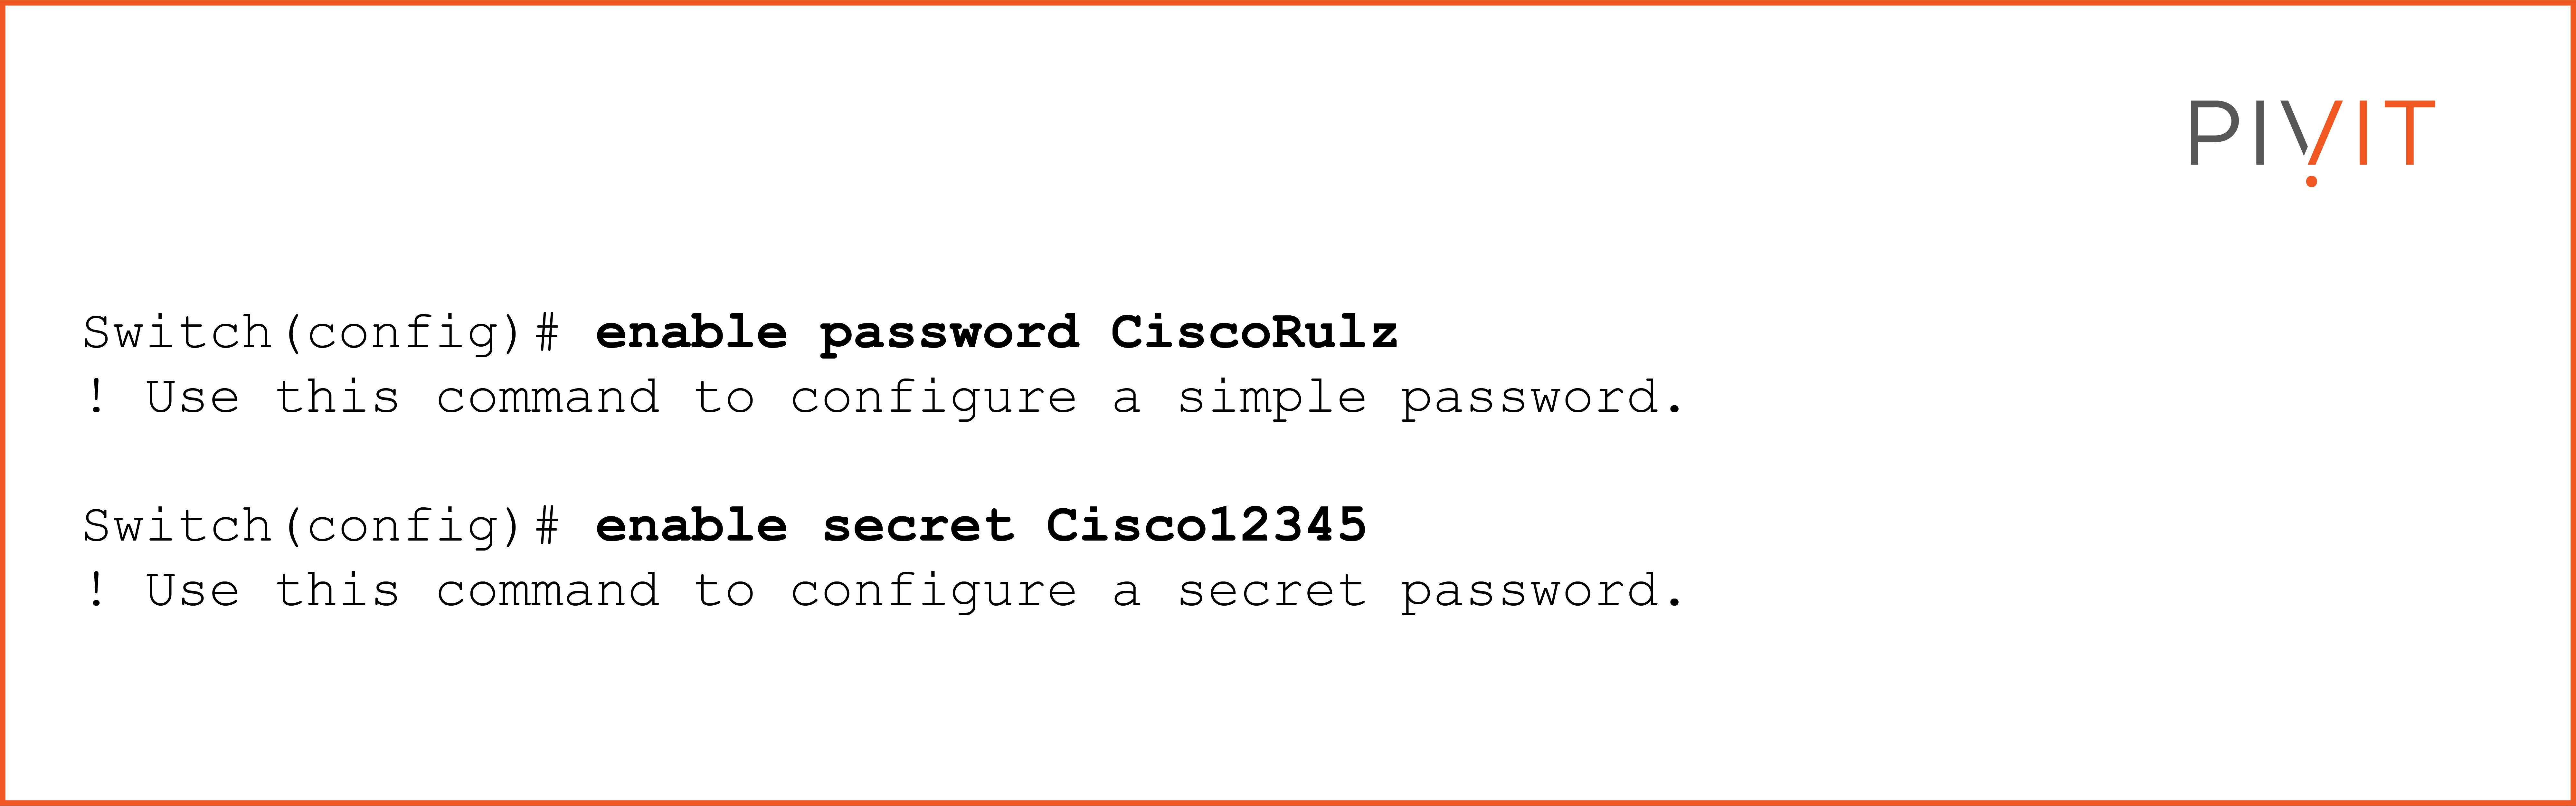
When both simple and secret passwords are configured, the secret password always takes precedence over the enable (simple) password, and only this one is accepted. It is recommended to use a secret password instead of a simple password.
Use the following command on a switch to verify the passwords in the running configuration:
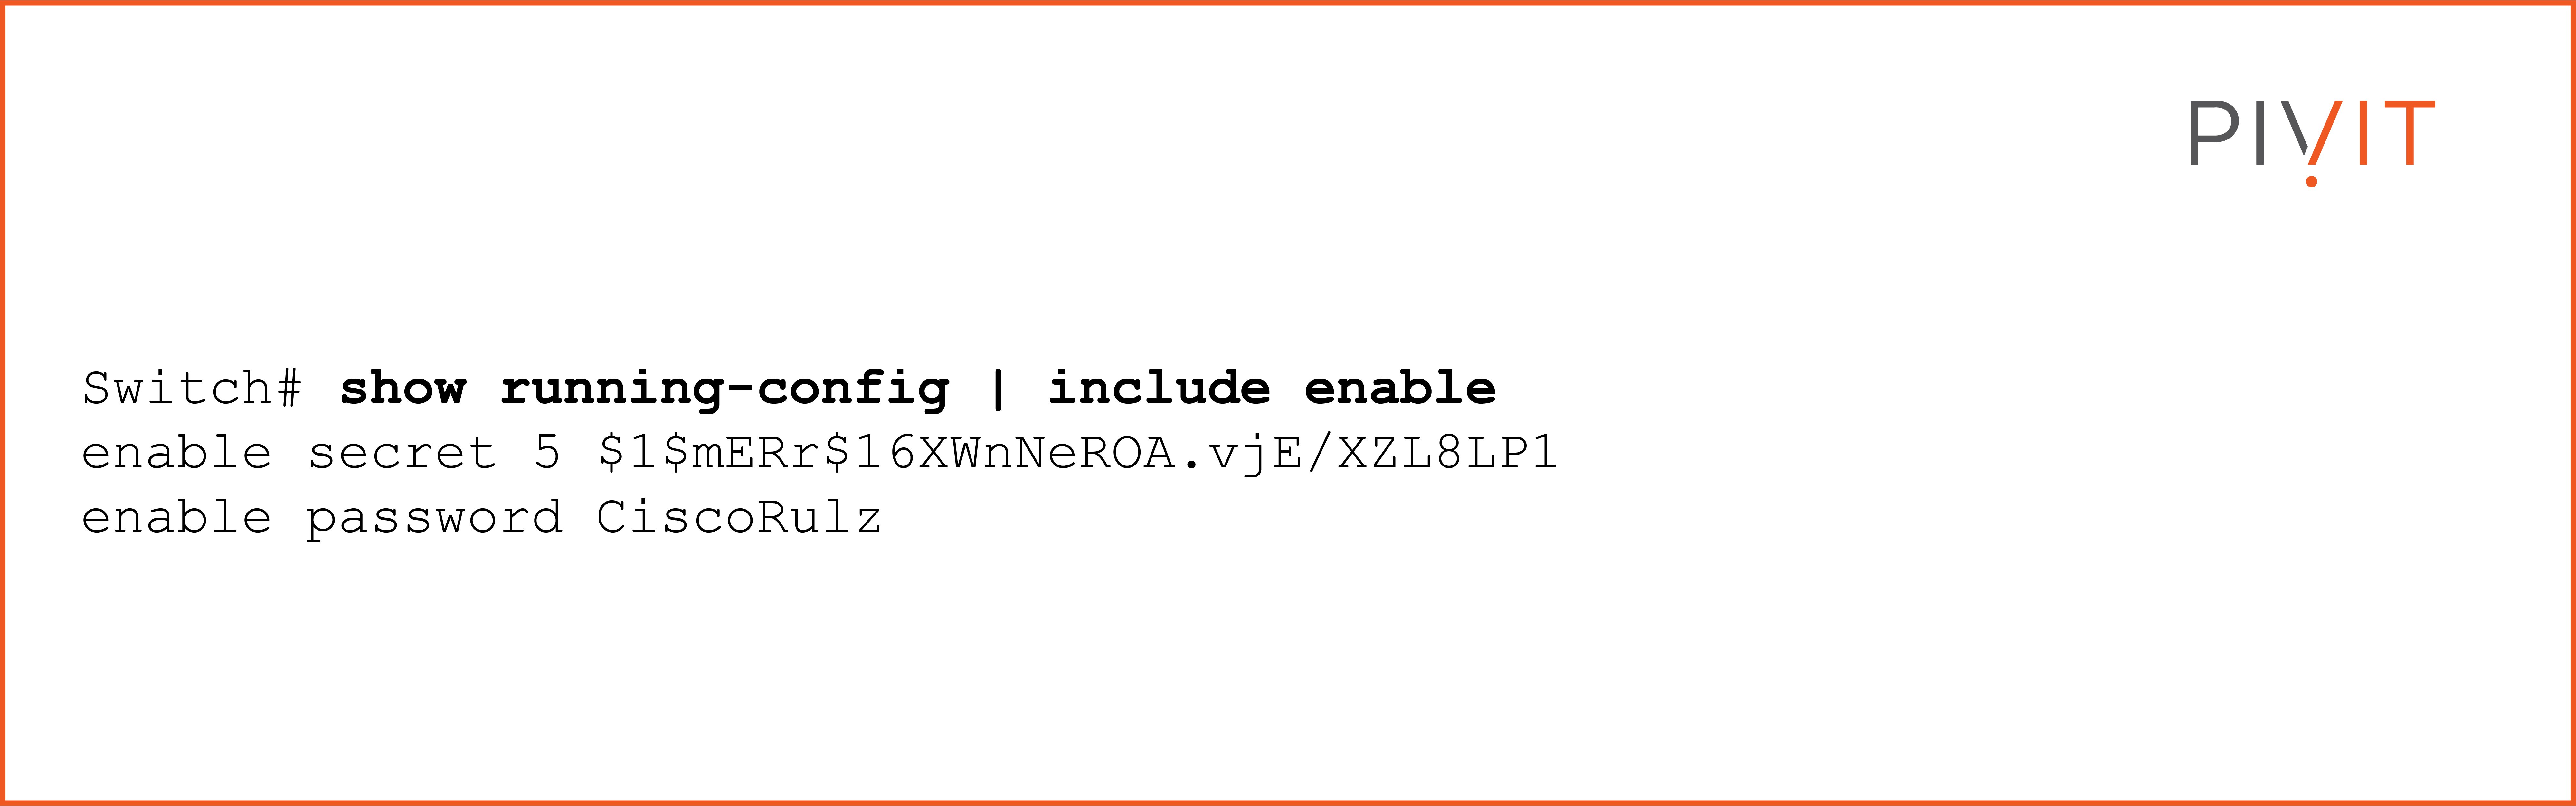
As you can see in the output above, the simple password is shown in cleartext, while only an MD5 hash of the secret password is kept instead of the password itself.
If you want to hide the plaintext password in the running configuration, you can simply encrypt them with type-7 encryption by using the service password-encryption command. Remember that this algorithm is extremely weak by modern-day cryptography standards, which is acceptable since the goal is only to hide the enable password not to be readable.
_________________
Do you need a new router, switch, or firewall, but you've been delayed by OEMs due to the chip shortage, or they've simply dropped the ball? At PivIT, we are dedicated to decreasing lead times to a minimum. Here are 4 steps you can take to avoid long lead times.

_________________
How to Secure Console Access
Console access to a Cisco IOS device is the more important type of access that offers the most privileges compared to other available options. Console access is the only option you can initially use on a device with an empty running configuration.
However, console access does not contain any access protection by default. Therefore, any user can connect through the console port without restrictions. To fix this unsecured approach, you need to configure some sort of protection asking the user to provide credentials before access is permitted.
There are two different ways to authenticate users. The first one is straightforward.
Inside the configuration mode of the console port, you need to define the password and enable the device to prompt the user to provide it by using the login command. The following commands provide access protection on the console port:
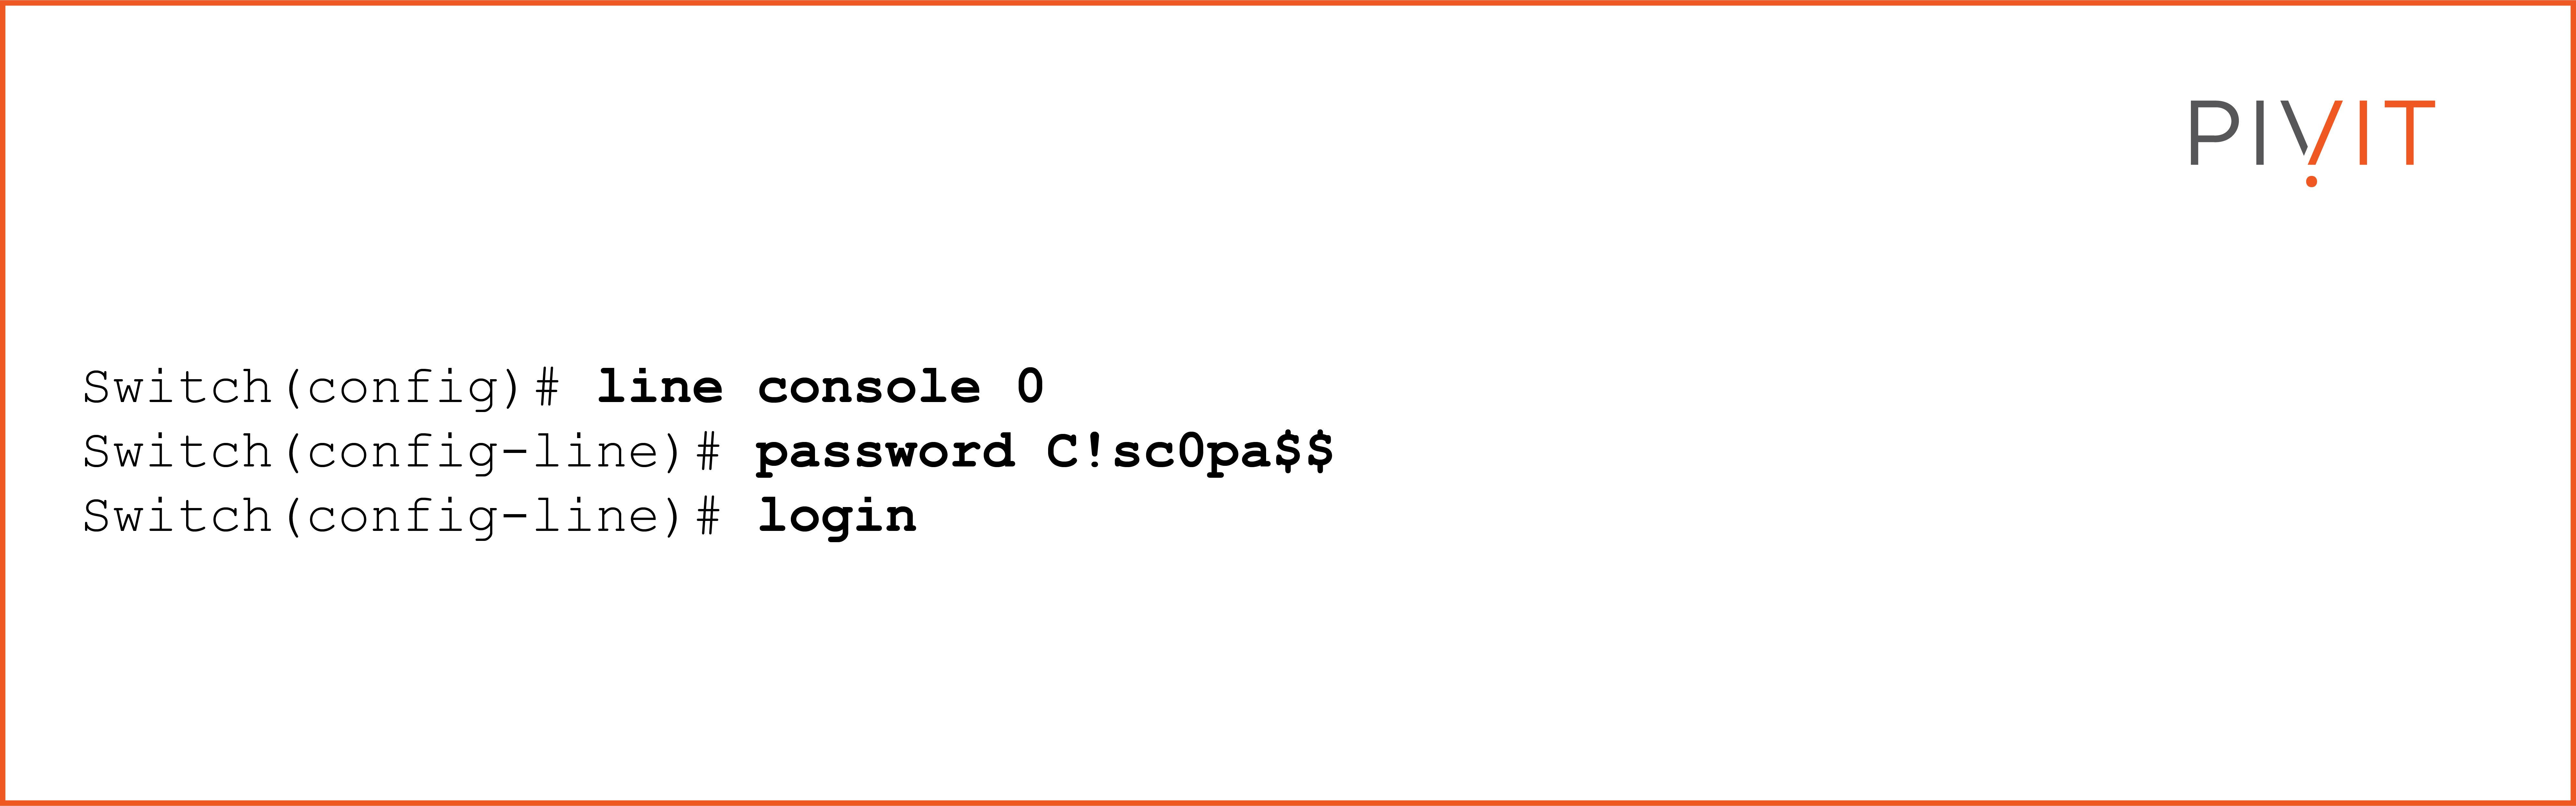
Just like the enable password, the console password is shown in plaintext in the running configuration. To hide it, the same service password-encryption command must be configured on the device.
As secure as this approach is, only a password is required when the user attempts to connect through the console port. At the same time, if there are multiple admins responsible for managing the switch, they all must share the same password.
You must use another approach to secure console access on a Cisco device to improve these limitations. It includes a username and password and requires the user to enter both credentials instead of the password only.
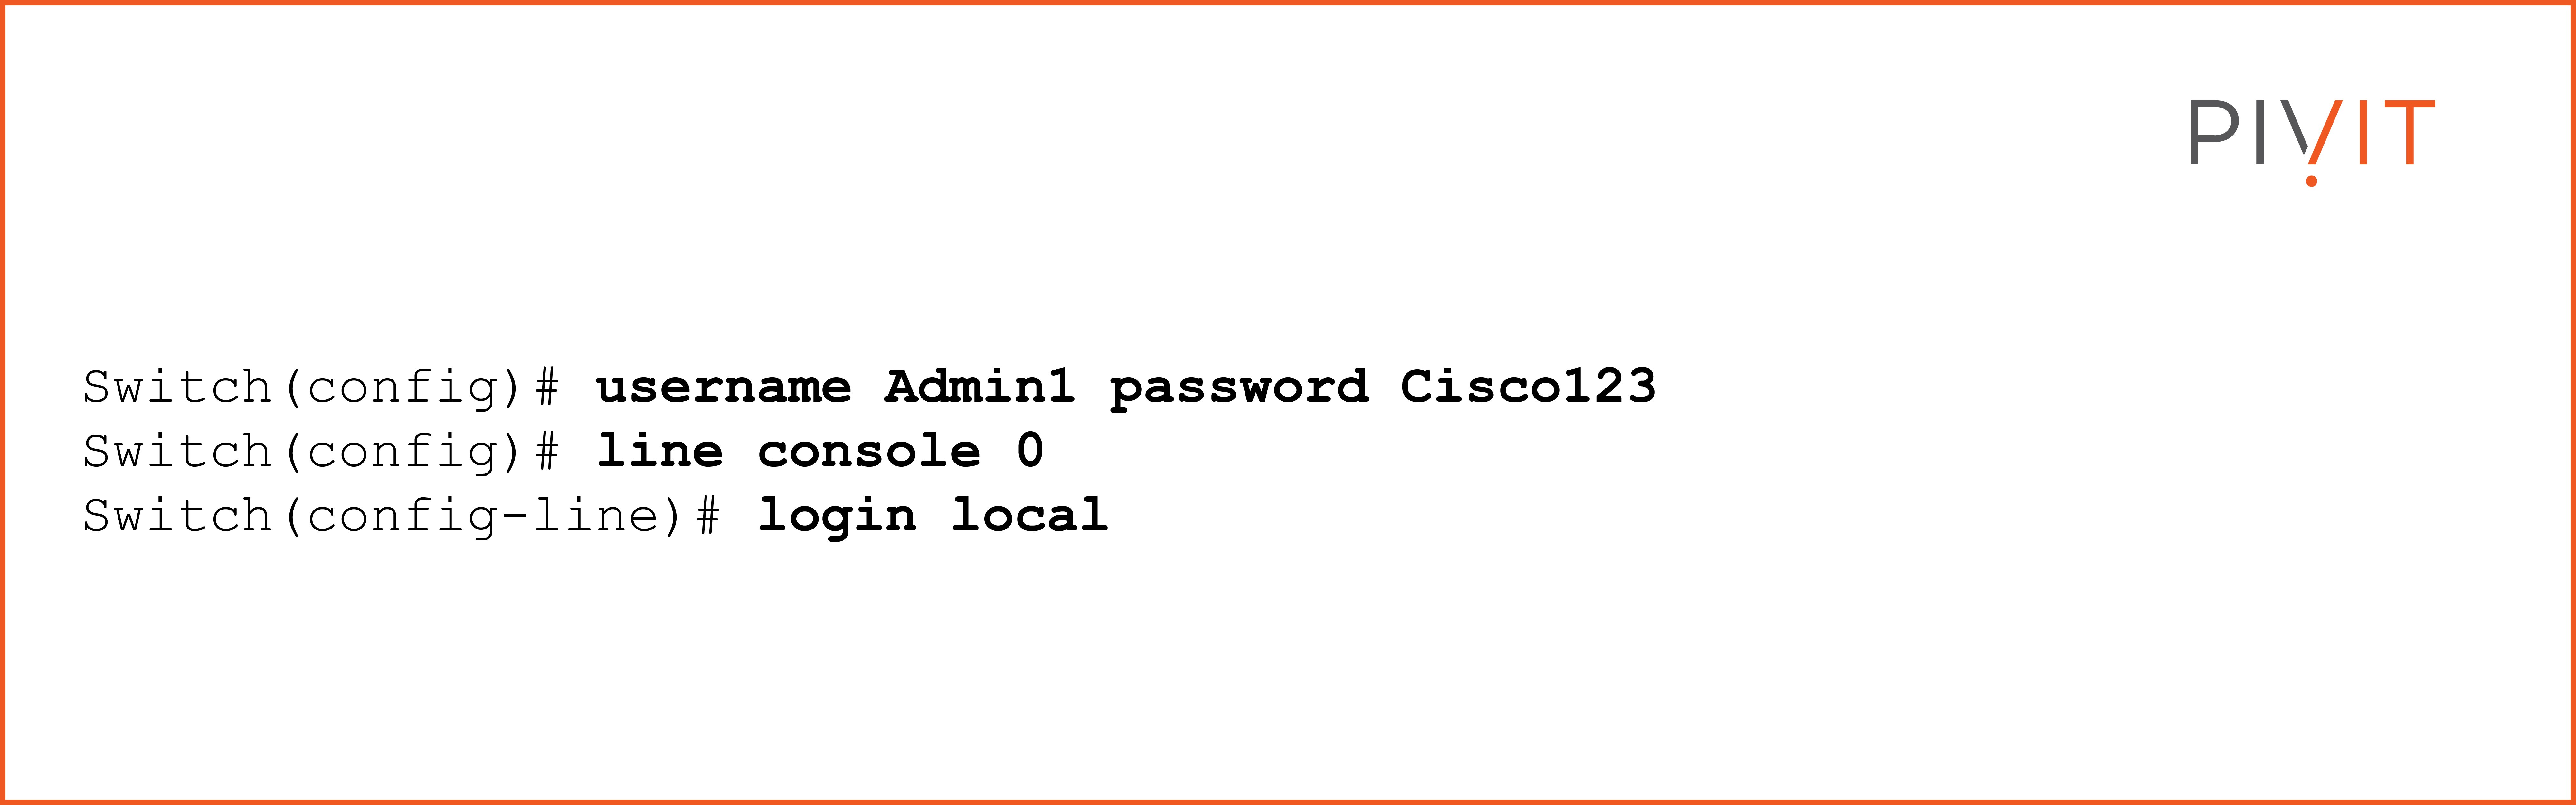
To support this, you need to create an account in the local database of the device and define both the username and the password. This way, you can create different credentials for different admins in the organization.
Since you will use the local database instead of the local password configured under the configuration mode of the console port, you need to use the login local command instead of the login command. This way, the device will prompt the user to provide both credentials and check them against the accounts available in the local database.
The following commands create a local account and use it for the protection of console access:
A more secure way to configure a local account is to use a secret password instead of a plaintext password. This way, the hashed version of the password will be saved in the running configuration. Depending on the IOS version, either MD5 or SHA algorithm will be used.
Additionally, you can modify the default inactivity timeout of 10 minutes for disconnecting idle EXEC sessions. If your company policy requires more strict rules, you can lower the timeout value to 5 minutes or maybe even less.
The command you need to use to define this parameter is exec-timeout and configured in the configuration mode for console 0.
_________________
Hardware Options
At PivIT, we bring options to the table that your traditional VAR won't, whether it is OEM options, financing options, maintenance options, and more. Click below to browse for a router and get started bringing options to your network!

_________________
How to Secure Remote Access
Since you will not always be physically close to the Cisco devices when accessing them, you will need to remotely access the devices instead of using the console port. You can establish a remote session by using either Telnet or SSH.
Although both protocols allow you to remotely configure the device just as being directly connected through the console port, they are opposite of each other when security is at stake.
While Telnet exchanges everything in cleartext, including the password, SSH works similarly to a VPN and protects the data being transferred. That’s why you should always use SSH when communicating over untrusted networks.
Remember that only Telnet is allowed on Cisco devices by default, so you must configure SSH and enable the device to support it. To learn more about these two protocols and find out more about their functionalities as well as the differences they have, take a look at this article.
When someone makes a remote connection to your Cisco device, it assigns a virtual terminal line on the remote session. Depending on the device and IOS version, different amounts of virtual terminal lines will be supported. To protect the virtual terminal lines, you need to use the same concept used to protect the console line.
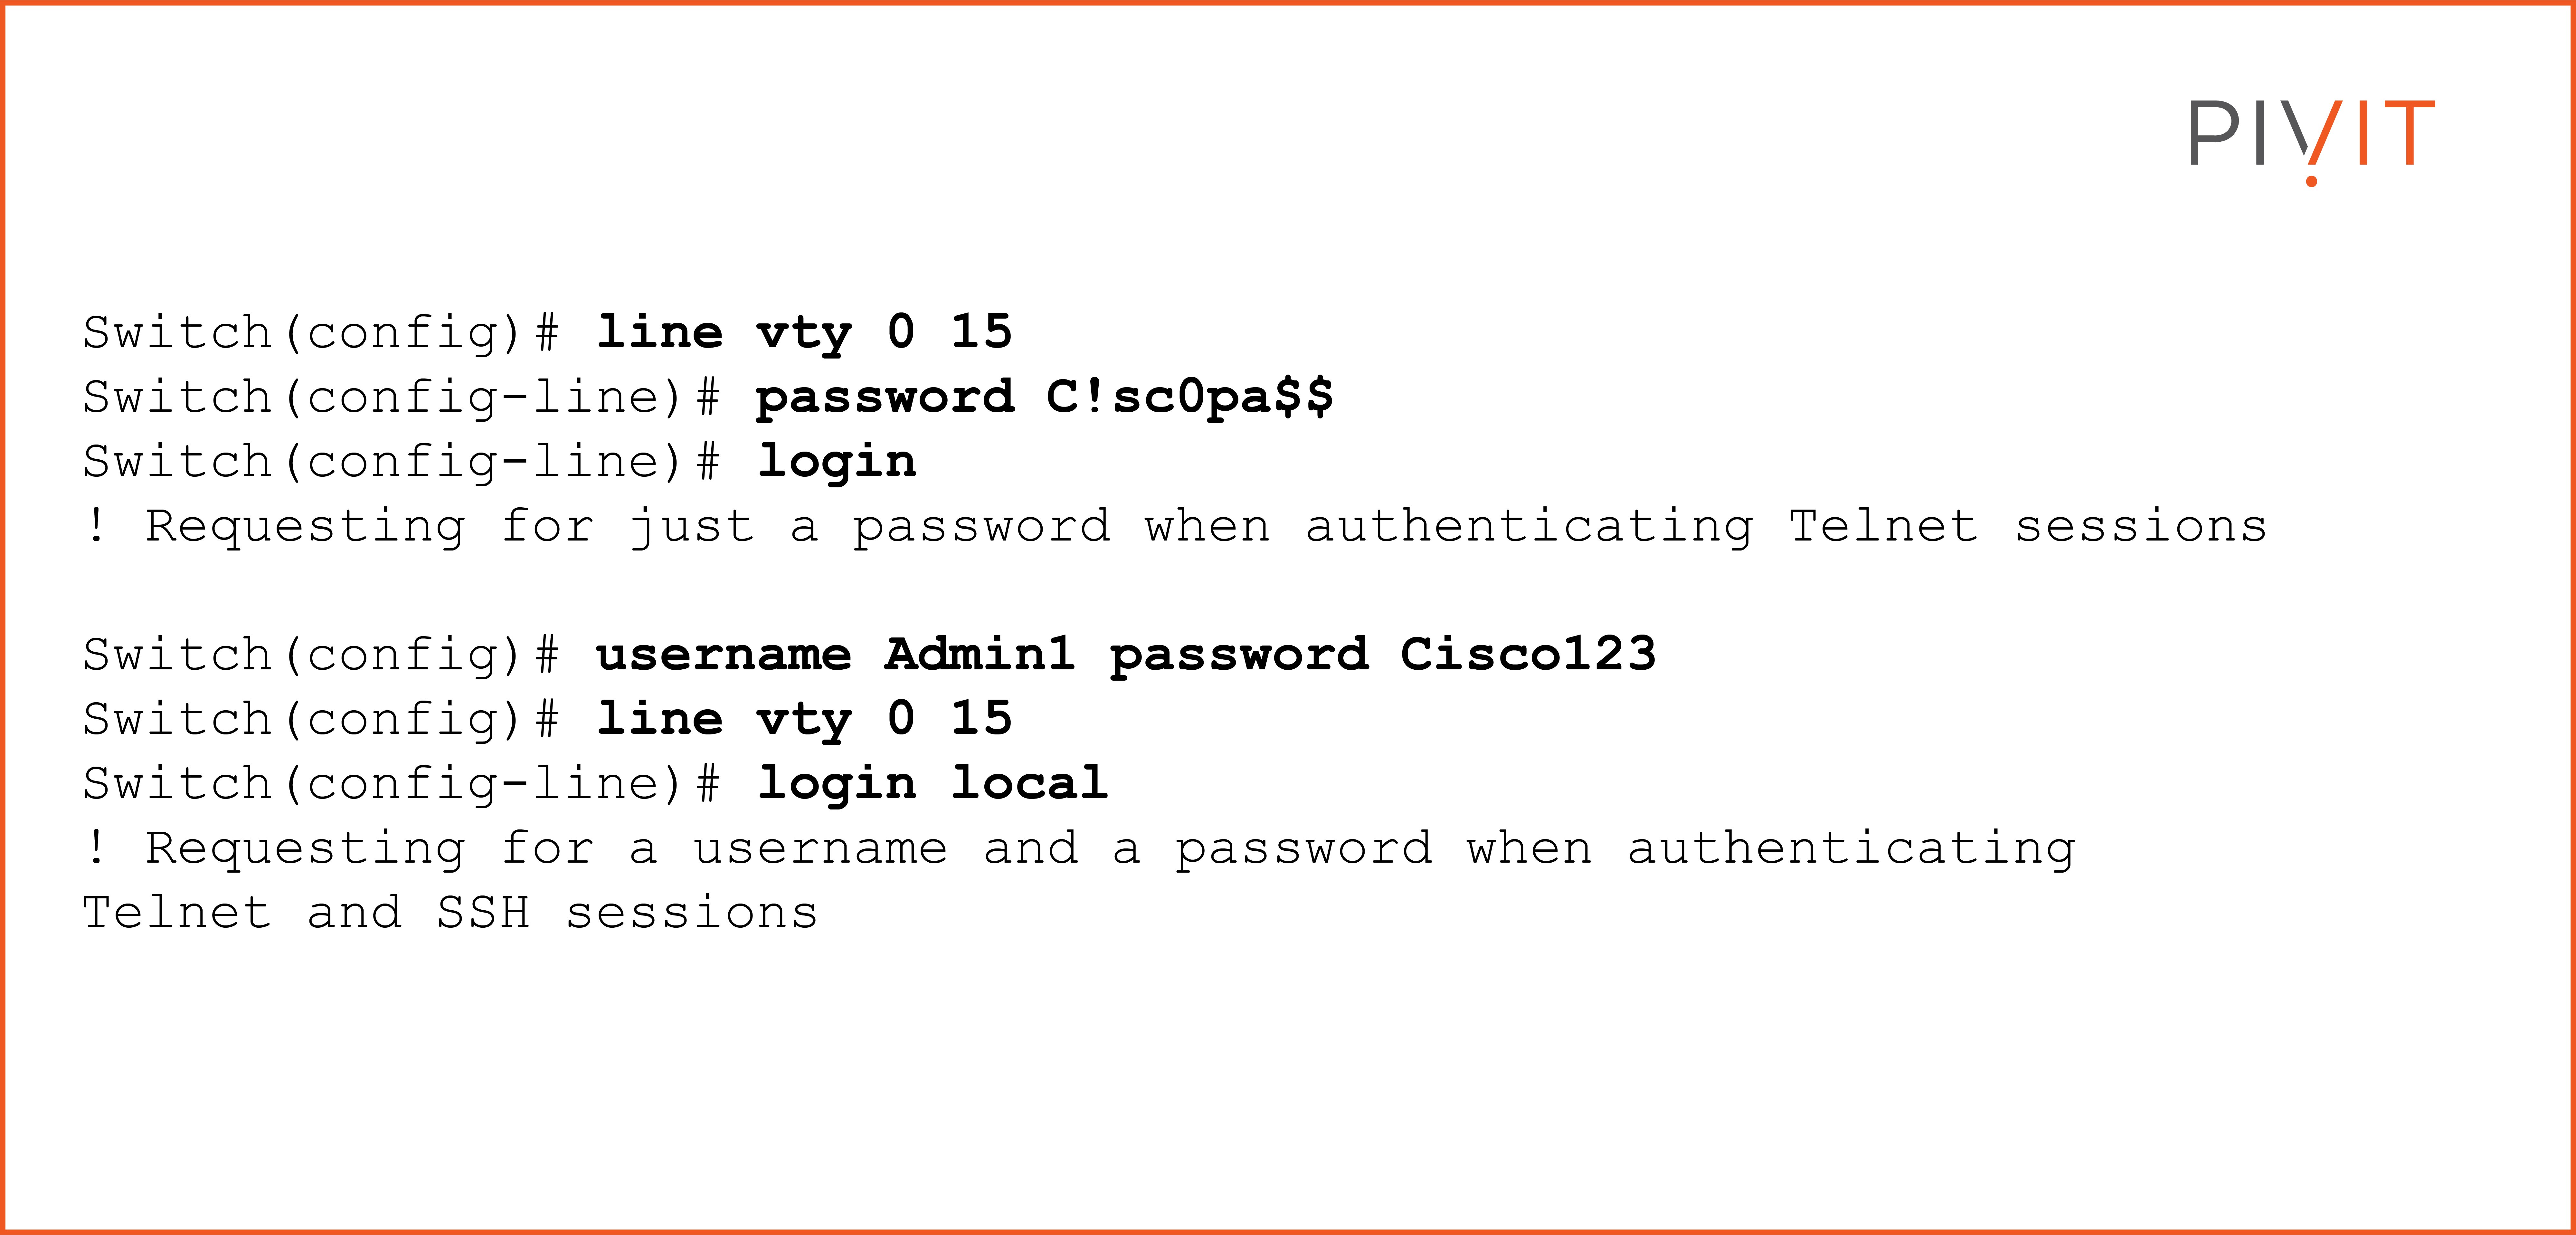
You can either define a password in the configuration mode for the virtual lines or define a local account in the device database to authenticate the remote user.
Although you can use both methods for Telnet, you must use only the local database when using SSH since this protocol requires a username and password to be provided. The following commands configure both authentication methods:
Just like the inactivity timeout configuration for console access, the exec-timeout period can also be set to a different value than the default of 10 minutes. You can also allow only SSH access on the device and deny any Telnet requests by using the transport input ssh command.
How to Limit Remote Access
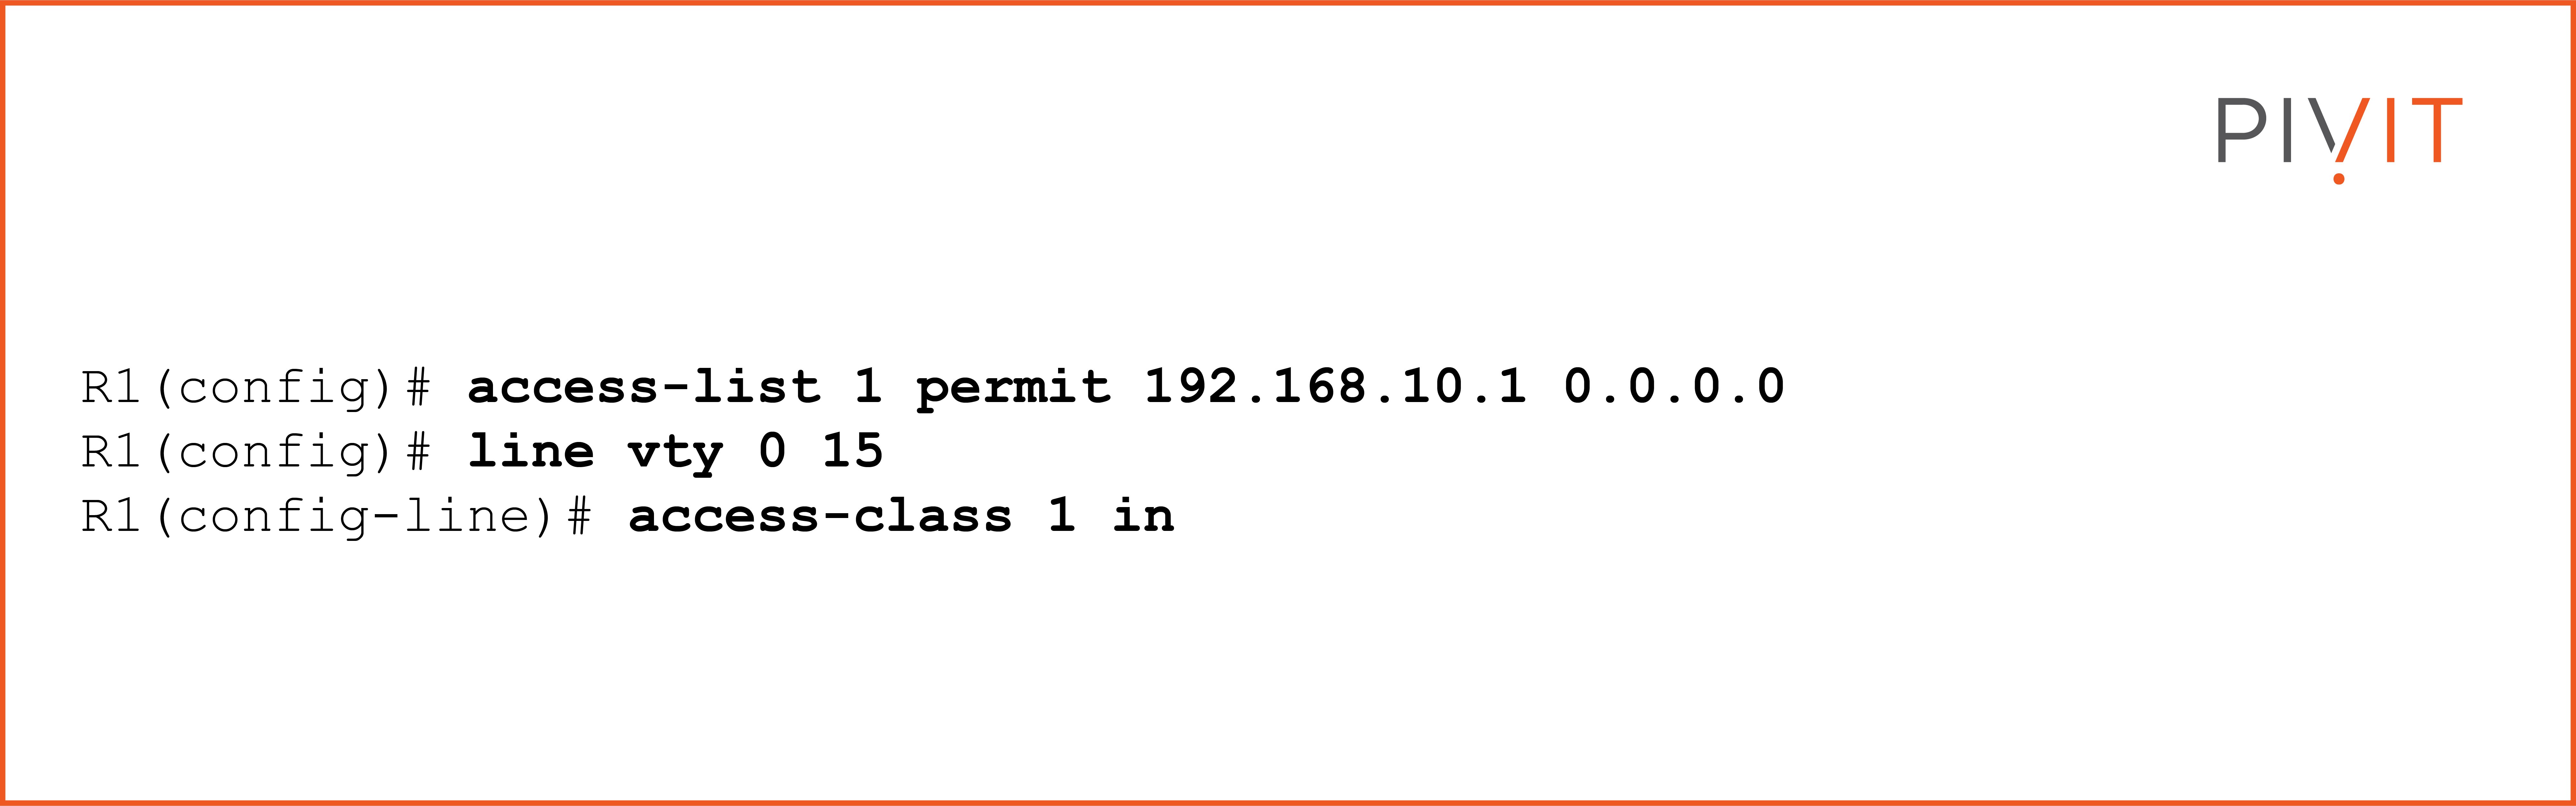
Additionally, you can filter out the devices that will be allowed to make remote connections to a Cisco device. The easiest way to achieve this is by configuring an access control list (ACL) that will permit only certain devices and deny remote sessions from the rest.
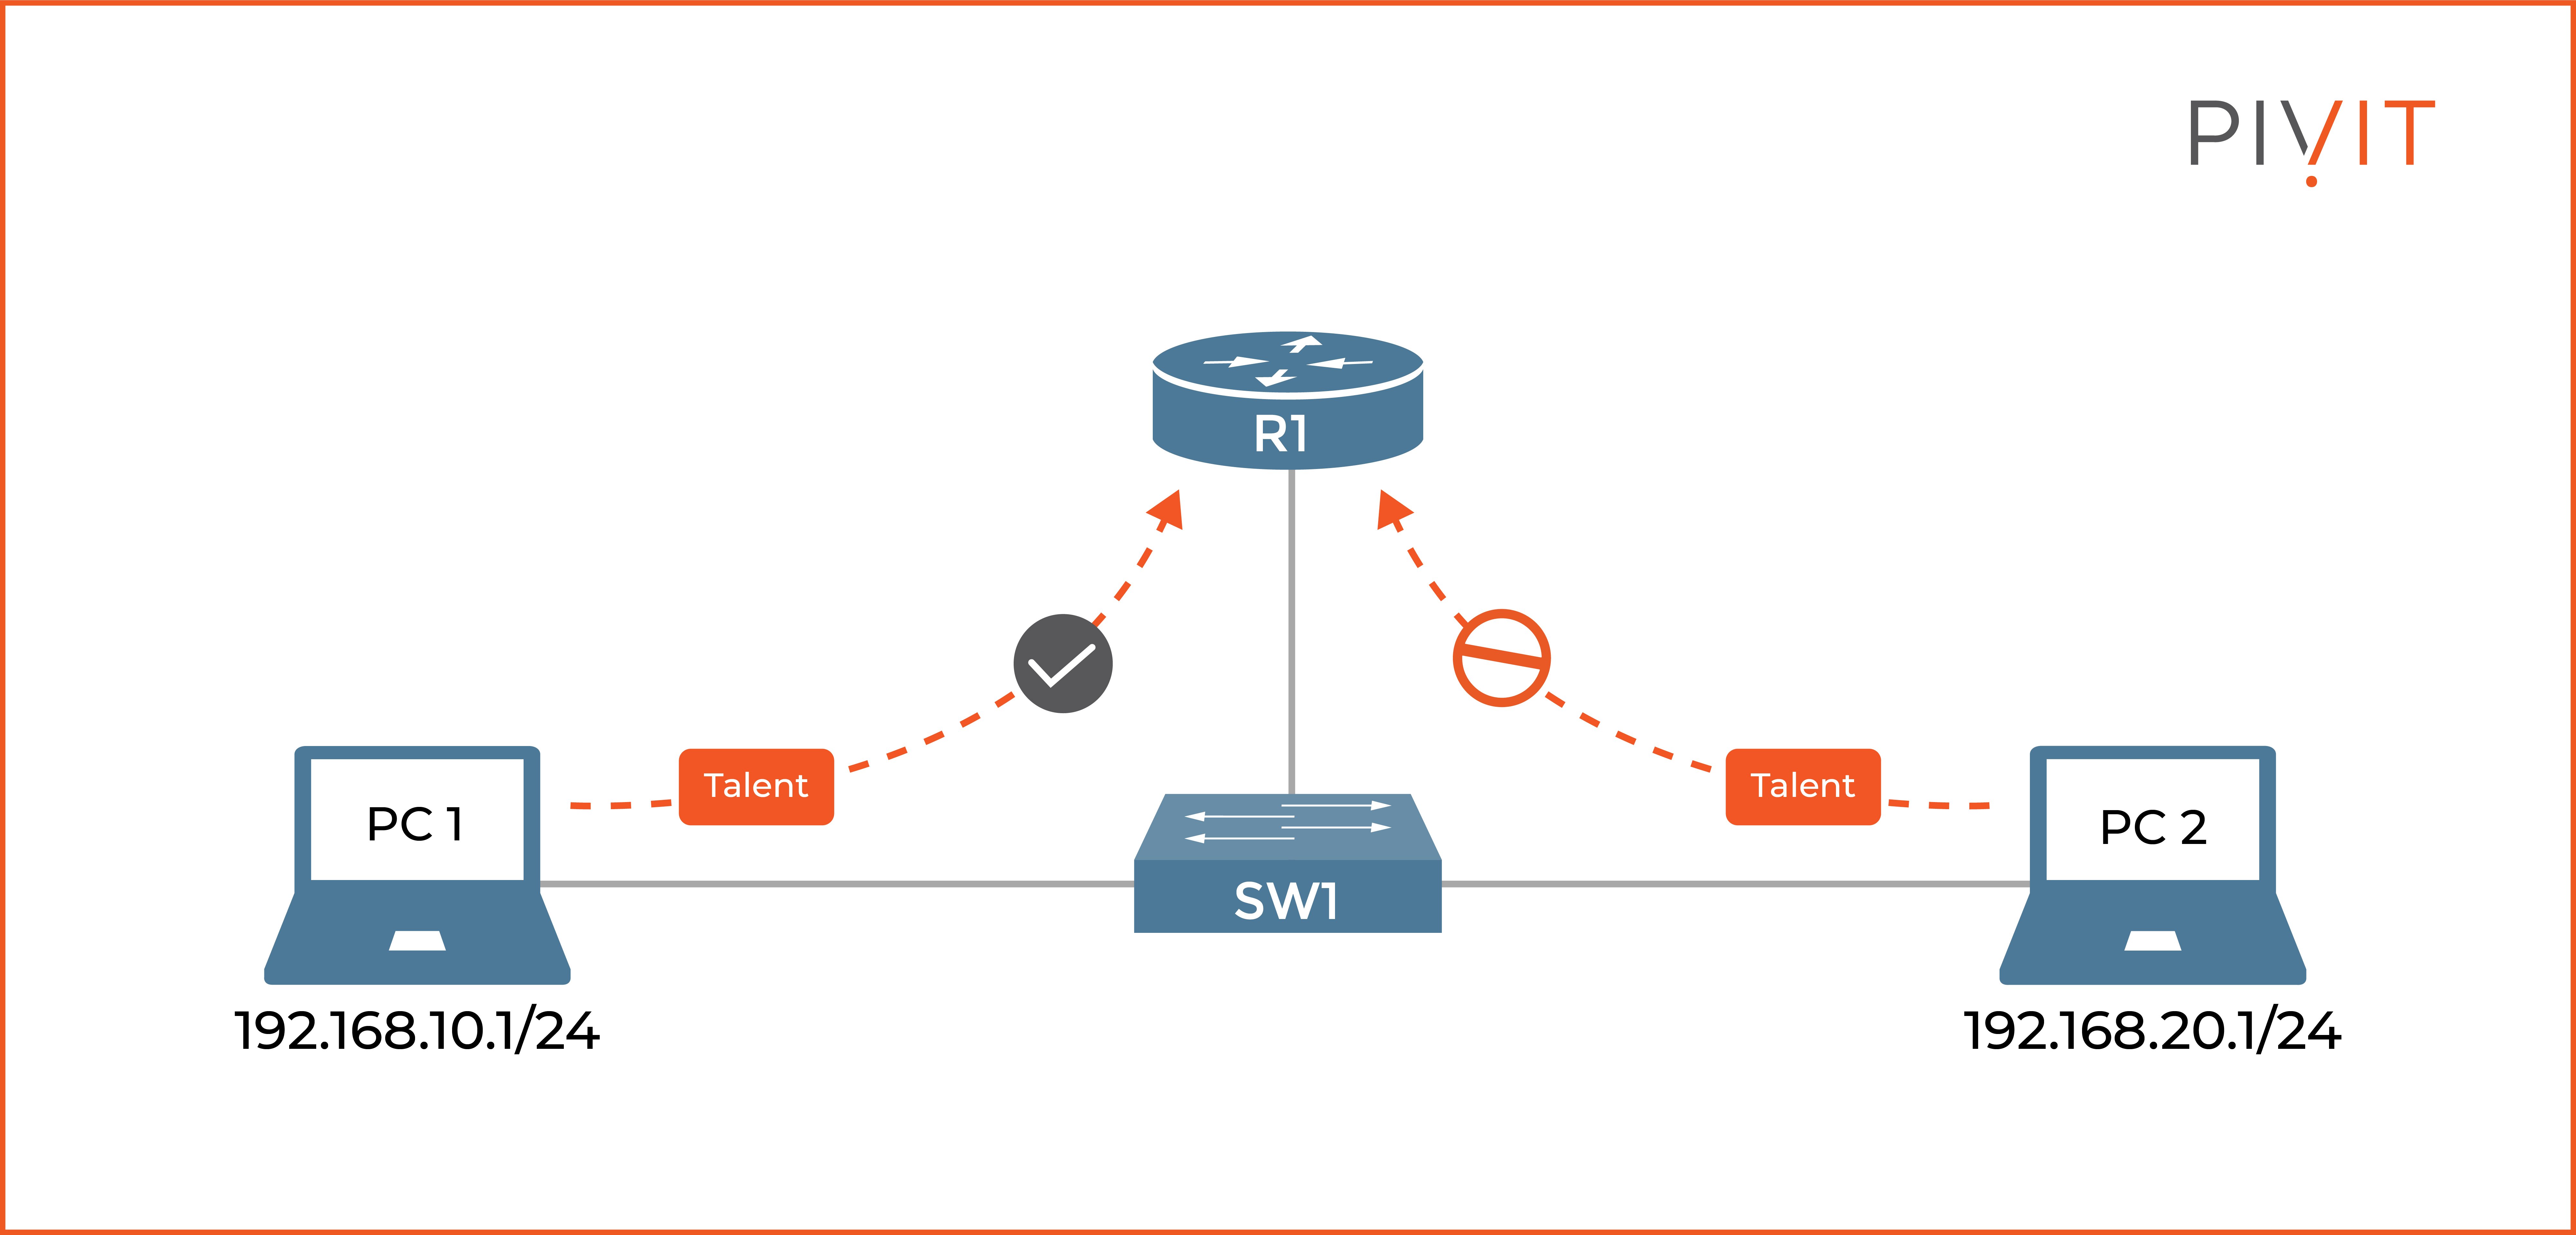
As you can see in the image above, PC1 should be allowed to make a Telnet session to router R1, while PC2 should be denied. You can do this by configuring an ACL on R1 and applying it to the virtual terminal lines in the inbound direction. The following commands need to be configured on R1 to achieve that goal:
To learn more about the basics of ACLs, read this article.
How to Configure Banner Messages
Displaying a message to the user when remotely accessing a device can be very helpful. It can save you from the trouble of connecting to the wrong device and thinking that you are connected to the correct one. This can easily happen, especially when several devices use similar IP addresses, such as 10.10.1.10 and 10.1.10.10.
In most deployments, banner messages are implemented for administrative access connection to the Cisco IOS devices. However, banner messages can also be critical in situations with legal issues involved.
Appropriately configured banner messages can be used as proof in court that the user has been warned that unauthorized access is not allowed and is against the law.
That’s why the banner message must be clear about the device being accessed and who can access it. Suppose a banner message states only “Welcome” or implies welcome in another way. In that case, the user who accesses the device may use that implication as a defense when caught performing malicious activities.
There are three different banner messages that you can configure on Cisco IOS devices that can be used as administrative access solutions:
- Motd banner: The message of the day banner is the first banner that displays when multiple banners are configured on the device.
- Login banner: This banner message is displayed before credentials are requested from the remote user.
- Exec banner: This banner message is displayed after successful authentication and authorization but before the first command prompt.
The banner messages are configured in global configuration mode, and any character of choice (except ?) may be used to start and end the configuration process of a banner message as long as it does not appear within the message itself.
The following configuration provides an example of configuring the three different types of banners using the dollar sign ($) to mark the start and end of the message:
Based on the banner configuration above, when a user makes a telnet session from R1 to SW1, the result will look like the following output:
Playing a Simple Yet Essential Role
As simple as previously covered security methods are, they are crucial in securing administrative access on Cisco devices. They provide basic but essential protection from unauthorized access and potential follow-up attacks afterward.
Therefore, it is essential to protect the privileged EXEC mode, the console access, and the virtual terminal lines in large and complex networks and small and simple networks consisting of only a few devices. Make sure you’re protected and use this guide to ensure you’re prepared.
Do you have the resources to implement the above protection? PivIT offers SmartHands as part of its EXTEND product. Gain access to engineers around the globe to help build your wired and wireless networks without ever leaving your desk when you are tackling staff shortages, complex environments, office relocations, or emergency situations.
